Install git#
Download the Git for Windows installer.
Run the installer and follow the steps below:
Click on “Next” four times (two times if you’ve previously installed Git). You don’t need to change anything in the Information, location, components, and start menu screens.
From the dropdown menu, “Choosing the default editor used by Git”, select “Use Notepad as Git’s default editor” and click on “Next”. (Note: as long as you know how to use it, you can choose any other editor from the list)
On the page that says “Adjusting the name of the initial branch in new repositories”, select “Override the default…” and type
mainin the box. In addition to being more inclusive, this will make things more compatible with our TU Delft GitLab setup and GitHub.Ensure that “Git from the command line and also from 3rd-party software” is selected and click on “Next”. (If you don’t do this Git Bash will not work properly, requiring you to remove the Git Bash installation, re-run the installer and to select the “Git from the command line and also from 3rd-party software” option.)
Select “Use bundled OpenSSH”.
Ensure that “Use the native Windows Secure Channel Library” is selected and click on “Next”.
Ensure that “Checkout Windows-style, commit Unix-style line endings” is selected and click on “Next”.
Ensure that “Use Windows’ default console window” is selected and click on “Next”.
Ensure that “Default (fast-forward or merge) is selected and click “Next”
Ensure that “Git Credential Manager” is selected and click on “Next”.
Ensure that “Enable file system caching” is selected and click on “Next”.
Click “Next” in the “Configuring experimental options” section.
Click on “Install”.
Click on “Finish” or “Next”.
If your “HOME” environment variable is not set (or you don’t know what this is):
Open command prompt (Open Start Menu then type
cmdand pressEnterType the following line into the command prompt window exactly as shown:
setx HOME "%USERPROFILE%"Press
Enter, you should seeSUCCESS: Specified value was saved.Quit command prompt by typing
exitthen pressingEnter
This will provide you with both the software git and the Git Bash program.
Git Bash (Windows only)
One great benefit for installing git for Windows users is that it automatically comes with Git Bash, a command line interface which has UNIX-style commands. This is useful because most of the solutions on the internet use this type of command, as opposed to PowerShell or other Windows-specific options. For example, in Git Bash you can use the command ls instead of dir to print the contents of a directory. Note that to get your Git Bash to recognize your conda environments , you should run:
conda init bash
Now you can use this instead of the Anaconda Prompt and you will be able to use UNIX-style commands!
Install Git for Mac by downloading and running the most recent “mavericks” installer from this list. Because this installer is not signed by the developer, you may have to right click (control click) on the .pkg file, click Open, and click Open on the pop up window. After installing Git, there will not be anything in your /Applications folder, as Git is a command line program.
For older versions of OS X (10.5-10.8) use the most recent available installer labelled “snow-leopard” available here.
This YouTube video may also be helpful, but note that the latter part of the video goes into other software that is not relevant for MUDE.
Authentication with SSH#
In order to connect to your repositories on GitHub, we need to properly authenticate ourselves. When we want to visit repositories at github.com, we need to log in via the web browser. The same holds if we want to interact with these repositories remotely with Git from our computer. This means that every time we make a commit, pull, etc., we need to provide our password, which becomes very tedious. Alternatively, if GitHub knows it is indeed us that are making the changes to the repository, we can remove the need to provide a password. This is accomplished with SSH (Secure Shell Protocol), and this section will show you how to do this in two main steps:
Creating an SSH key on your computer, and
Adding the SSH key to your GitHub account.
You can also refer to the GitHub Documentation for more information.
Open up a terminal window (Git Bash on Windows). Next, type (or copy and paste) the following command:
ssh-keygen -t ed25519 -C "GitHub"
You will get output that looks something like this:
Generating public/private ed25519 key pair.
Enter file in which to save the key (/Users/<user>/.ssh/id_ed25519):
Press enter to use the default path (the one between parenthesis). Keep note of this path, as we will need to visit it later on.
You will now be asked to enter a passphrase. You can give one, but you will be asked for it every time you make a commit, so it’s better to leave this field empty and use this key only for GitHub. After the command is done executing, it will generate two files:
id_ed25519andid_ed25519.pub. The.pubfile is the public part of the SSH-Key which we need.Go to GitHub and log in. Click on your profile icon on the top-right of the page, then go to Settings. In the menu on the left, go to SSH and GPG keys.
Navigate to the
id_ed25519.pubfile that we generated in step 2. Open the file with a text editor (Notepad on Windows, textEdit on Mac). Copy its contents and paste it in the ‘Key’ field of SSH and GPG keys menu. Give the key a Title and click ‘Add SSH key’.Note: on macOS, the
.ssh/folder is hidden by default, so you won’t be able to find it in Finder. To show hidden files and folders, press Command + Shift + ..At this point, your screen should look like this:
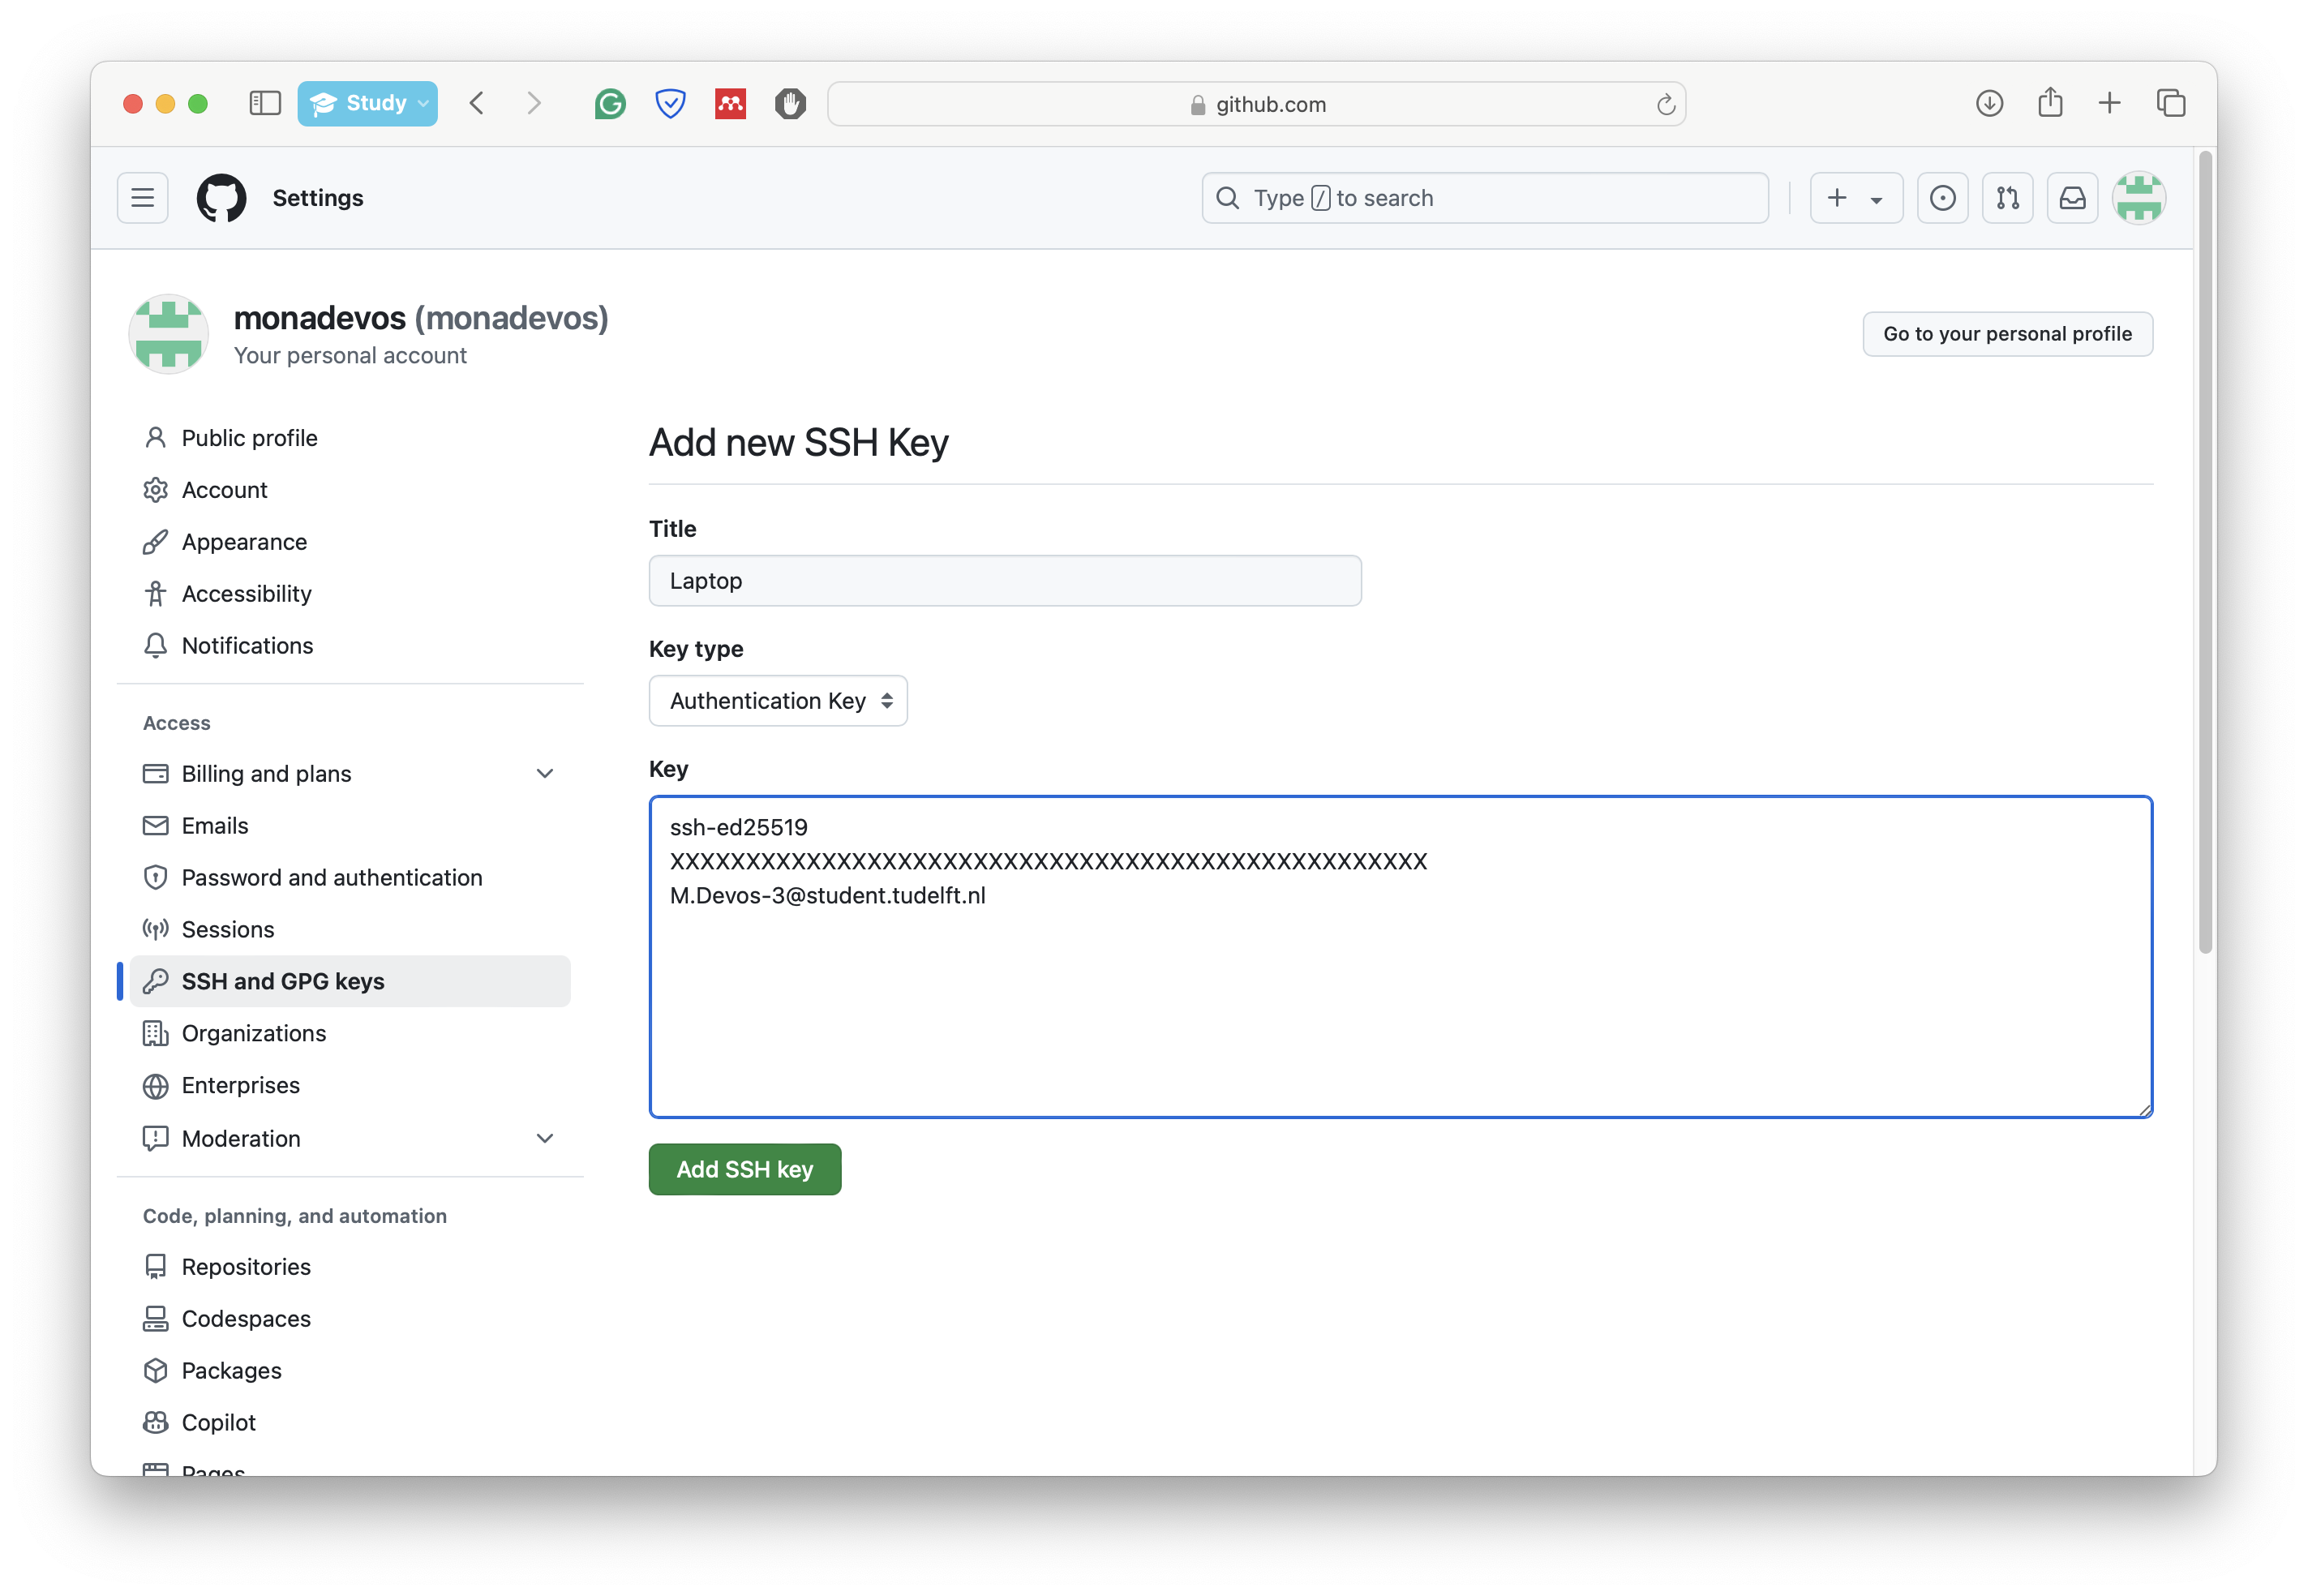
Fig. 22 Add SSH Key to GitHub Account.#
Note the key contents will be different for you: just make sure you copy the contents of the file
id_ed25519.pub.Now test the connection. Go to the terminal (Git Bash on Windows) and type:
ssh -vT git@github.com
You should get a huge output, but somewhere at the end of that output it should say something like:
Hi <username>! You've successfully authenticated, but GitHub does not provide shell access.
Setting up Git#
Before we start, we first need to locally set up the git environment, so that when we make changes, we can be identified as the author of those commits. Open git-bash on your computer and type the following lines in the command line interface and use your name and email address between the quotation marks.
If you will be uploading your progress on a university instance of GitHub/GitLab, it is recommended to use your student email when committing.
git config --global user.name "Kiril Vasilev"
git config --global user.email "k.v.vasilev-1@student.tudelft.nl"
Console example in Fig. 23:

Fig. 23 Setting up name and email to use for git#
Note that in the commands above you do not need to type the $ sign.