Making Commits to the Remote Repository (Web IDE)#
This page will show you how to make commits to the remote repository directly from the web browser. If you only have small changes to make to a small number of files, this can be faster than doing it with your local repository.
What is the web IDE?#
IDE stands for integrated development environment. It is a software that makes it easier to develop code and software, for example, by highlighting code syntax, or including command line interpreters to run the code. You may be familiar with other IDE’s such as Matlab, Spyder or Visual Studio Code (VS Code). In fact, the IDE integrated in the GitLab website is actually VS Code.
Edit a file#
To edit a file via the web browser we need to open it in the web IDE. First click on the file in the GitHub repository, then click on the arrow next to the pencil icon and select open with ‘github.dev’ (Fig. 24).
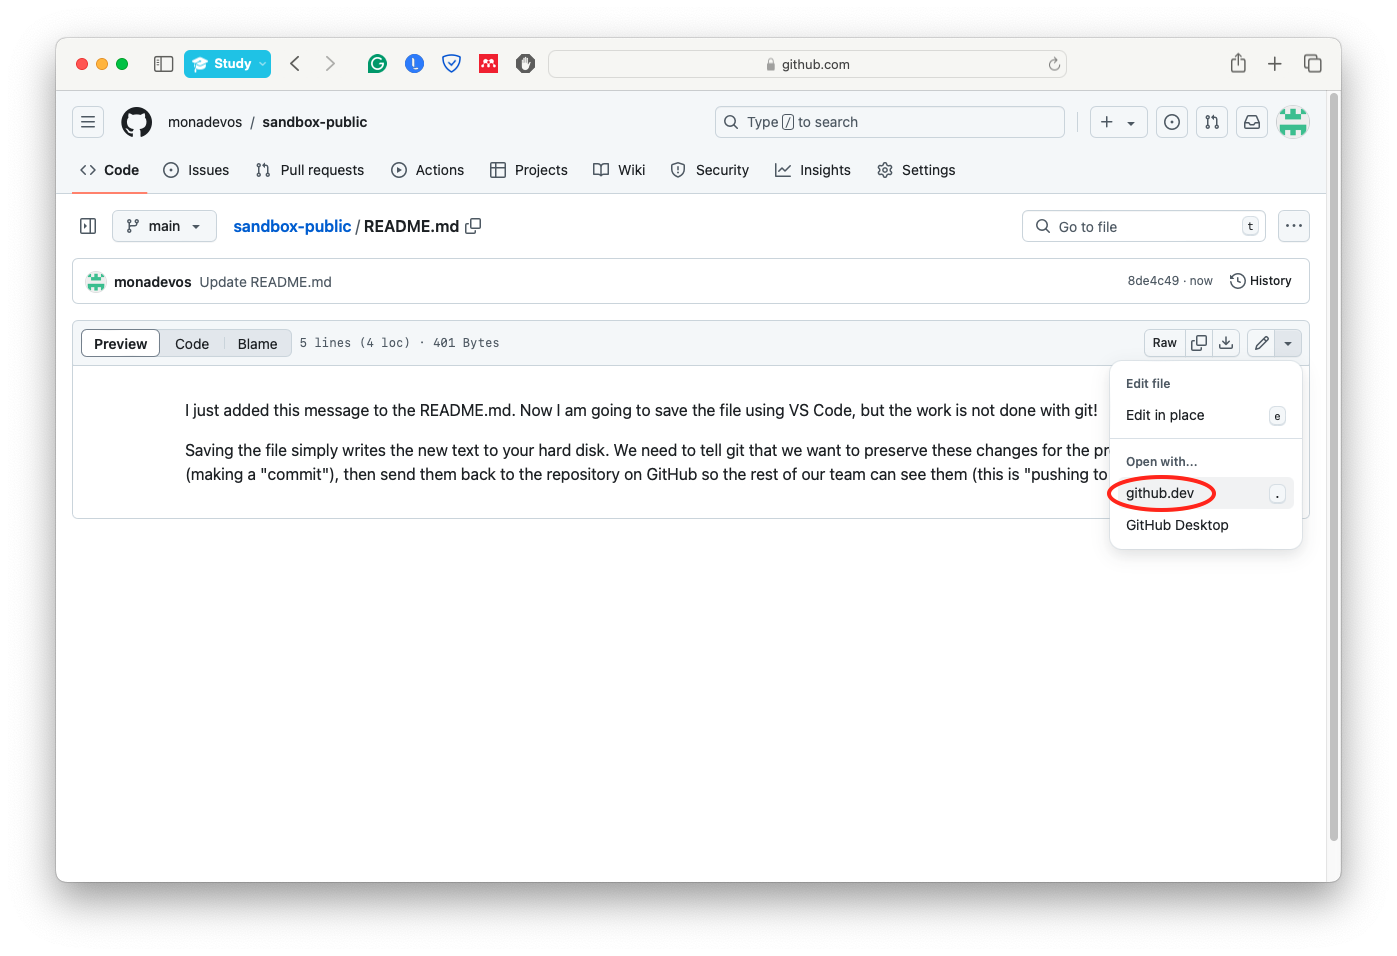
Fig. 24 Button to edit file in GitHubs’s Web IDE.#
Once this opens, you will see a familiar editor (VS Code). The file will be visible and you can edit the text as needed (Fig. 25). Note that if more files were present in this repository, you would be able to see them in the left panel, and clicking on them would open them in additional tabs next to README.me in the editing panel.
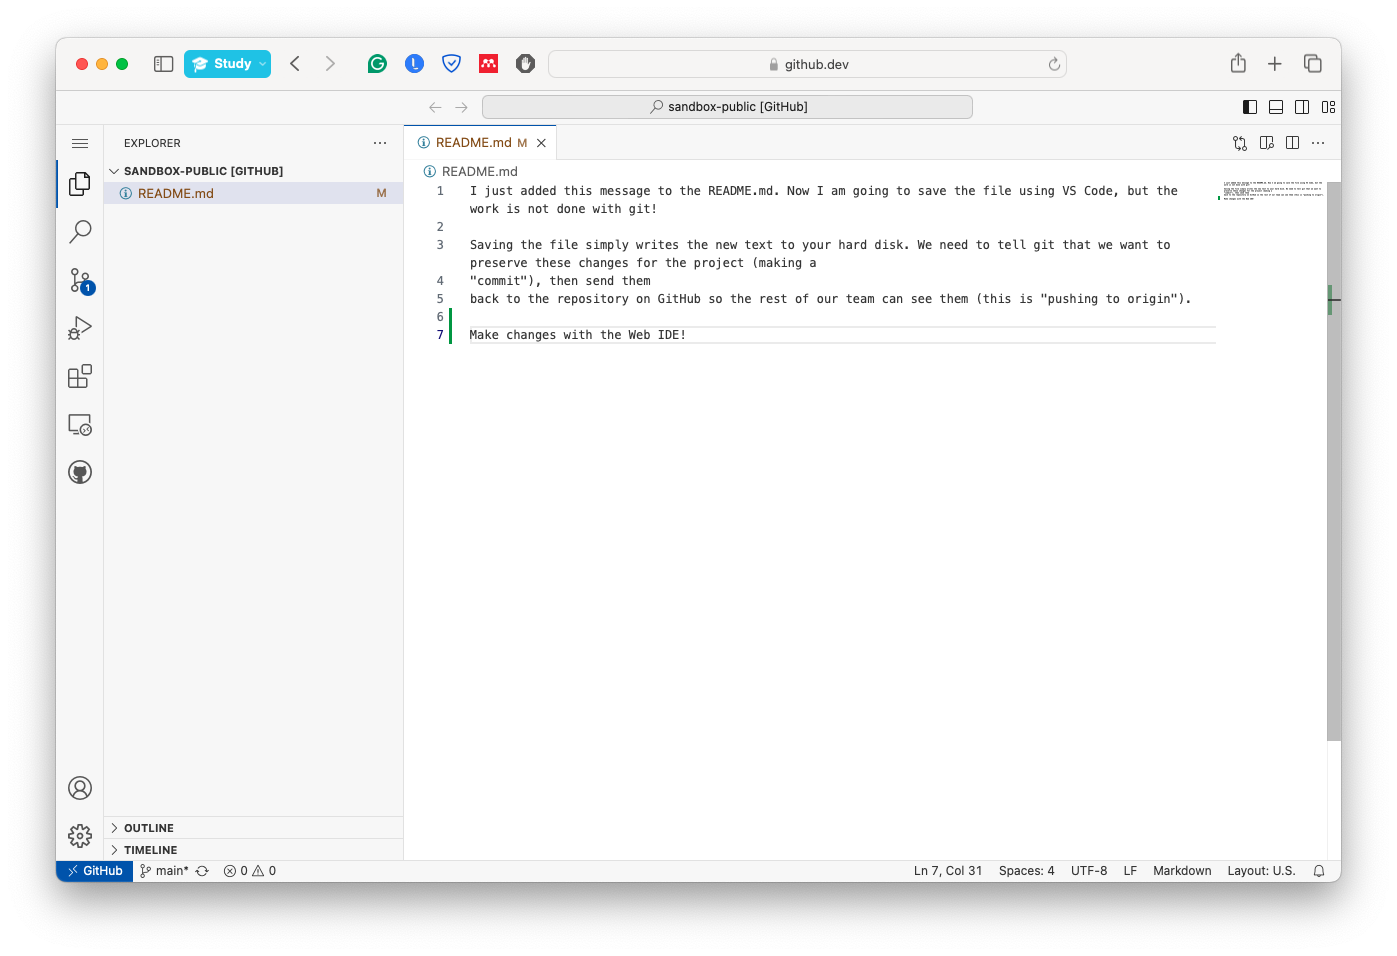
Fig. 25 View of Web IDE: editing README.md.#
Make your changes to the file as needed. Note, however, that there is no “save” button in the Web IDE: changes are automatically preserved as long as you keep the tab open.
Make a commit#
At this point we are ready to make our first commit, but what does that mean? A commit is the way that we tell the git software to make a record of the change that we just made to the file. That’s it!
Making a commit is very easy via the git Source Control panel, which you can access by clicking the branch-like icon on the far left side of the browser window ( Fig. 26, just below the magnifying class icon). As illustrated in the figure, all changes are listed in the left panel, and you can easily edit the commit message and make a commit using the blue button “Commit & Push”. The commit message can be extremely useful for reviewing changes, however, especially when working with multiple people. It is important to write concise (limit it to 50 characters max), yet descriptive commit messages. It could be useful to write your commit message such that it completes the following sentence: This commit will….
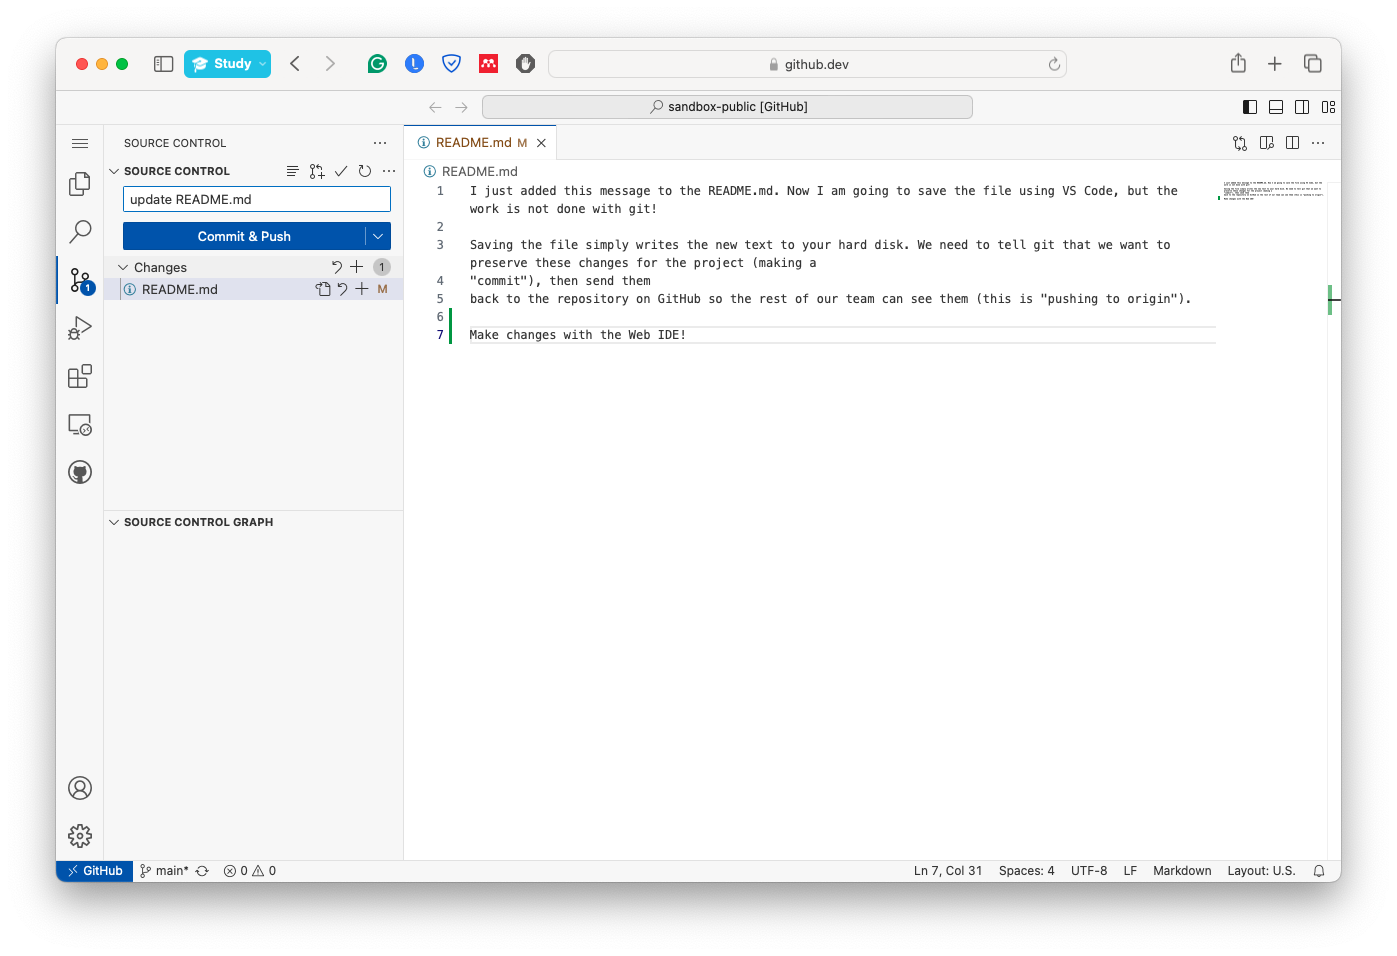
Fig. 26 Making a commit in the Web IDE.#
Once you have made the commit, you can return to the main page of the repository in GitHub to see the changes, visible in Fig. 27.
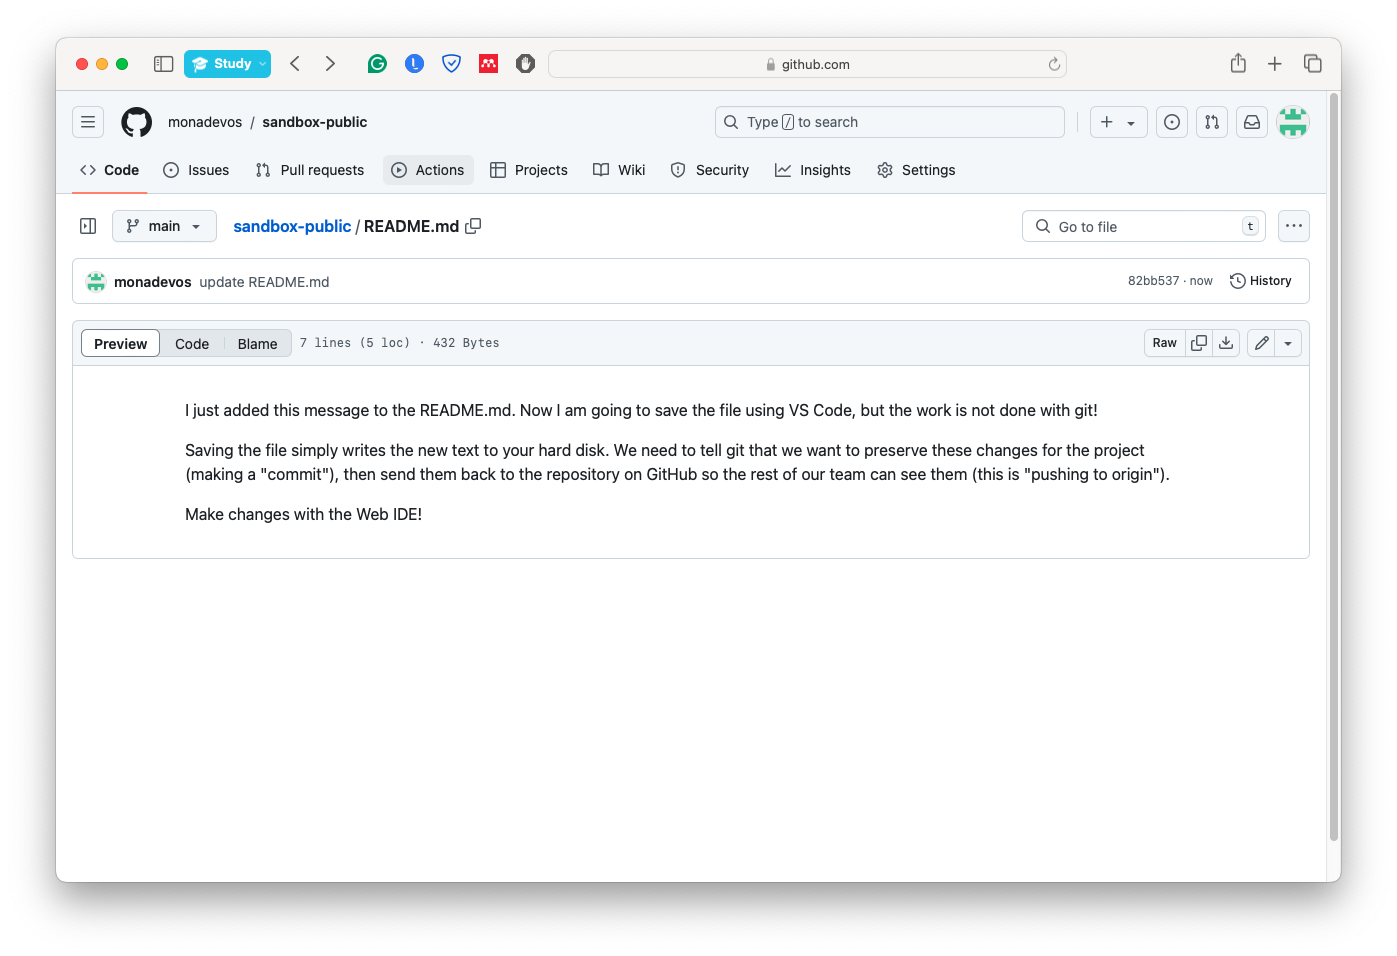
Fig. 27 Confirmation of the Web IDE commit.#