Making Commits to the Local Repository#
Now that we have learned how to clone a repository, we will find out how to make changes to it and record by making commits.
The remote repository#
We begin by identifying the repository on which we would like to work, in this case sandbox-public; the starting condition is visible in Fig. 35 after cloning and opening your repository (see previous page). We can see that it began as a completely empty repository, except for the default README.md file that GitHub creates automatically.
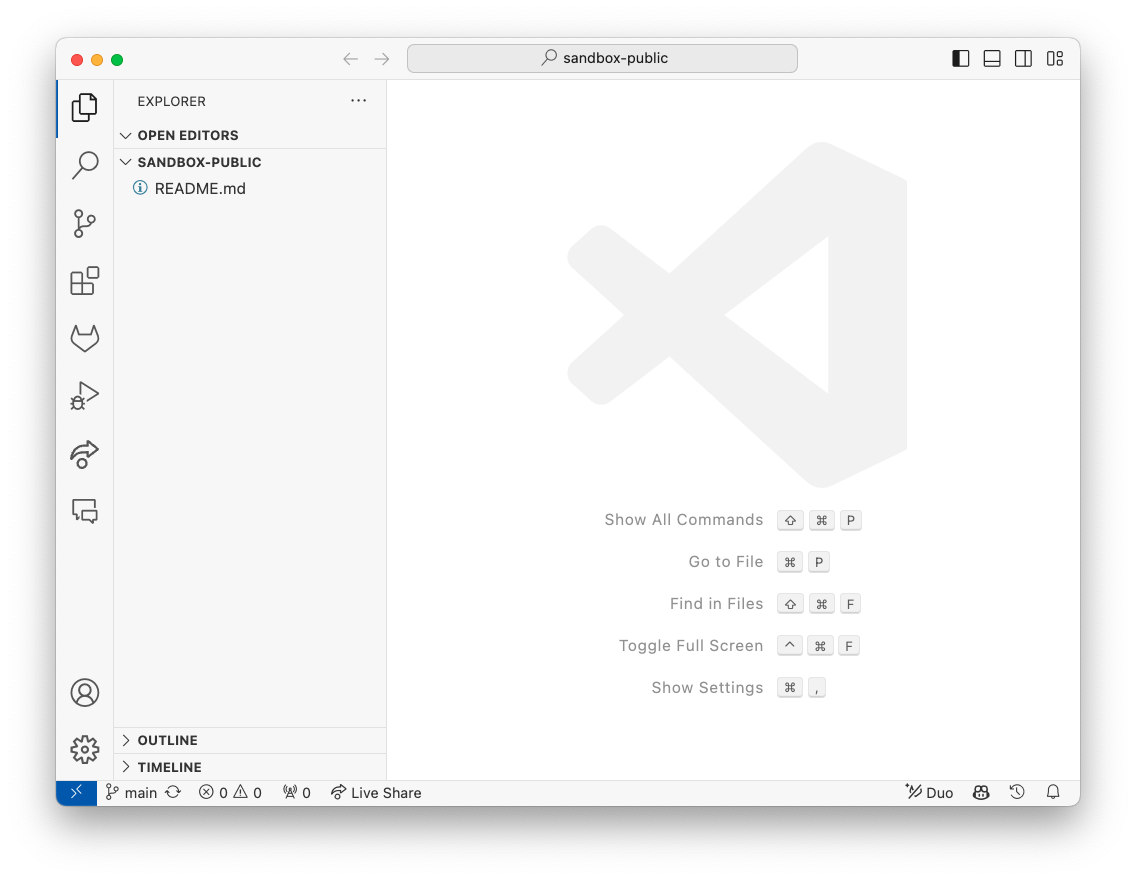
Fig. 35 Starting position after cloning GitHub repository and opening it in VS Code.#
Edit the local file#
Now that our repository is cloned, we are ready to get to work! First we will make a change to README.md in VS Code. As shown in Fig. 35, we have removed the title and added some relevant text. Save the changes to the file then click the Source Control tab.
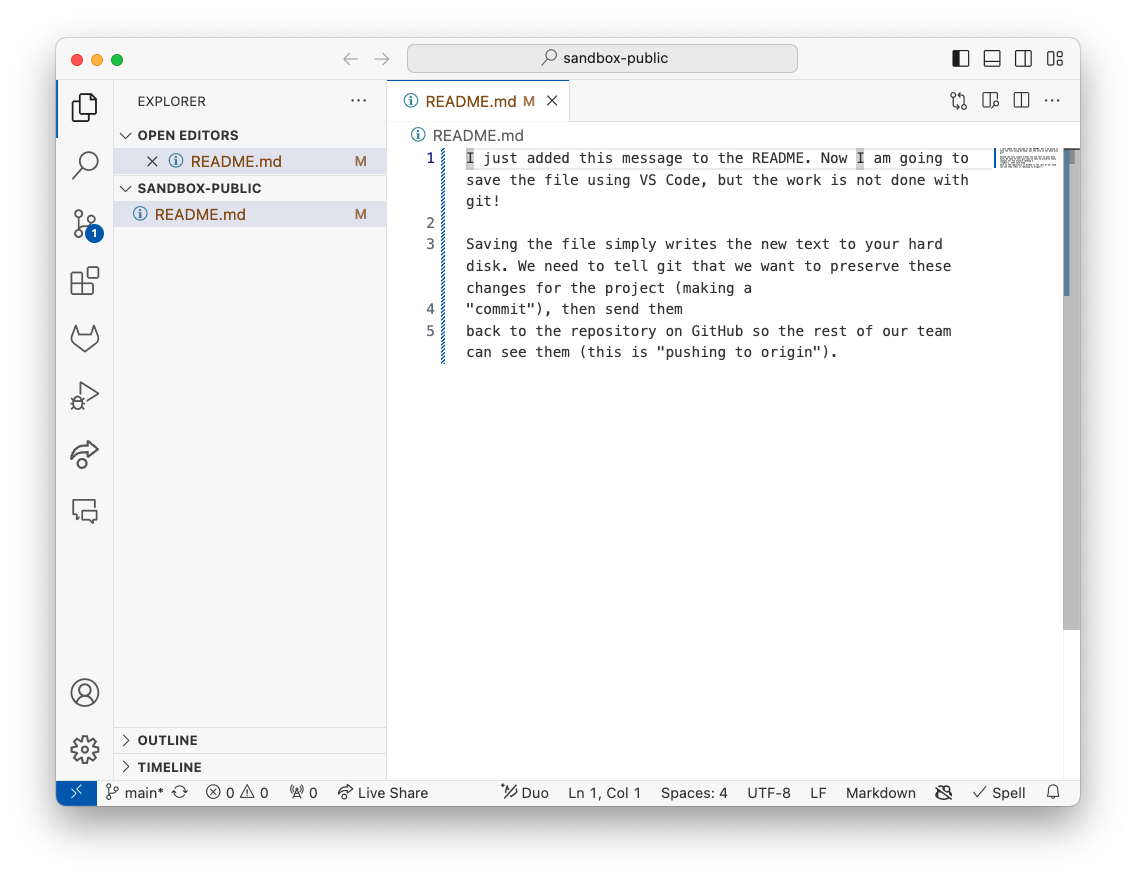
Fig. 36 Example of changes to the original `README.md`` file in text editor.#
Don’t forget to save changes!
It is important to remember to save the changes you make to files (either CTRL+s or by clicking the save button). This is how git recognizes that a file has been changed, after which it registers what those changes are.
Once the changes have been saved, open the Source Control view in VS Code. You will see the changed files listed under Changes.
If we click on the README under Changes we can see in Fig. 37, git has now registered the changes in our file. git uses a few text symbols to identify and describe the changes, for example, a + and -. VS Code highlights the changed lines in green and red, making it very obvious what happened.
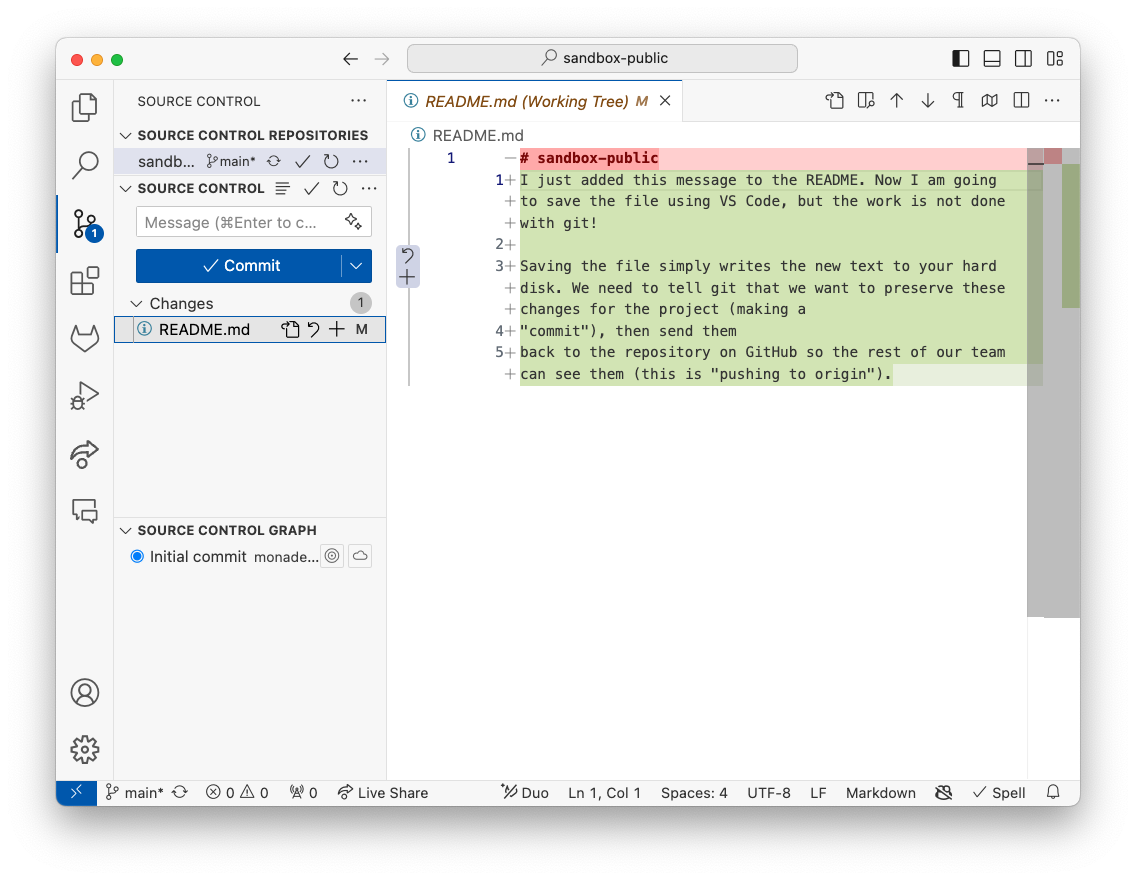
Fig. 37 Summary of changes made to README.md in VS Code Source Control.#
We now need to stage the changes that we wish to commit, either click the + icon next to the file or use the Stage All Changes option if there are multiple files you wish to commit. Staging refers to the process of preparing changes to be committed. When you stage changes, you are essentially marking them to be included in the next commit. This allows you to selectively choose which changes to include in a commit, providing more control over your project’s history.
Fig. 37 also illustrates the space above the “Commit” button where you can provide a commit message.
Note
A local commit can record changes made to more than one file at once–we are only editing one file at a time now, to keep things easy to visualize.
Another commit#
Because the change to our README.md was so large, it was difficult to see all the changes. Let’s try making another one. Using the change summary in Fig. 38, can you tell what happened to the file?
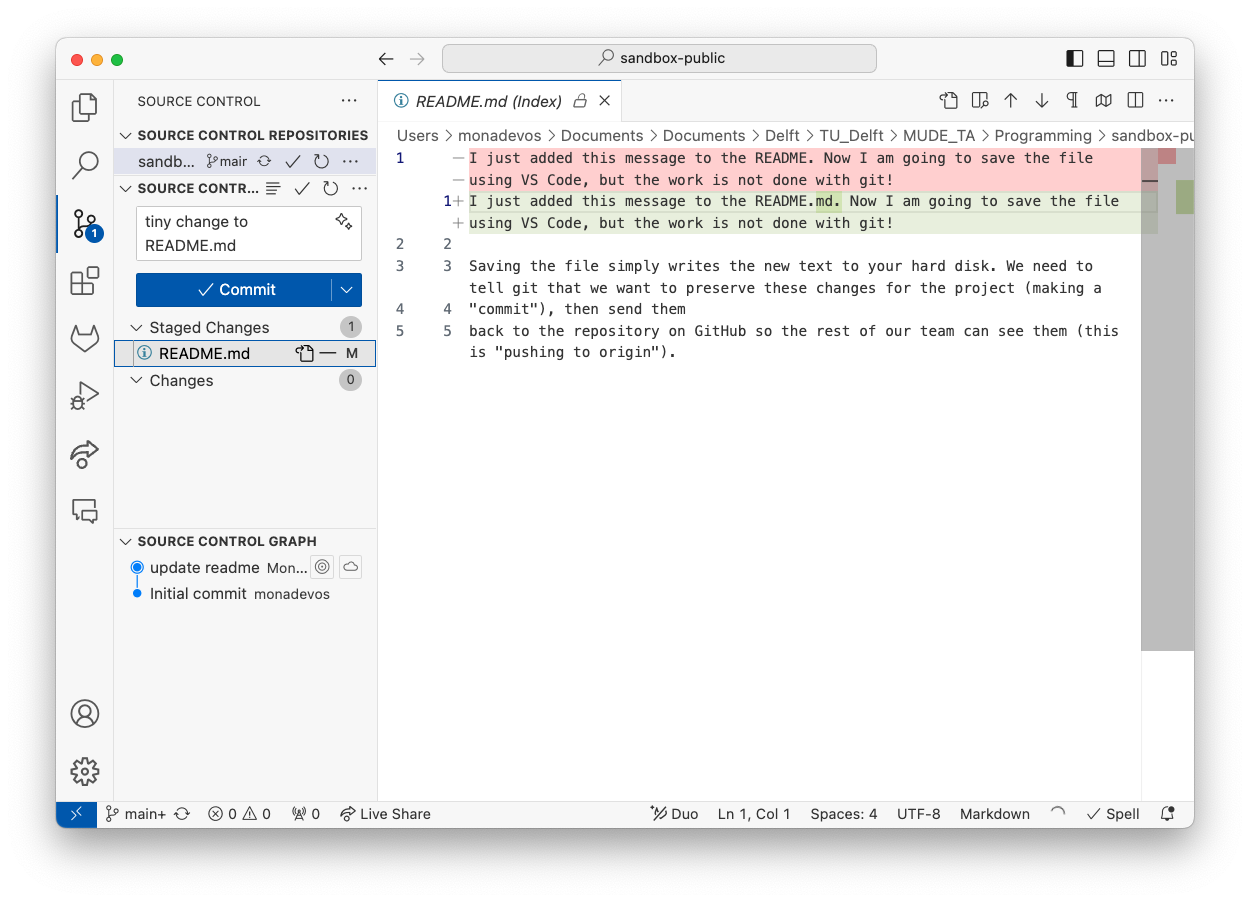
Fig. 38 A small change to README.md.#
See the change here
All we did was add the .md to the end of README.

Fig. 39 The small change to README.md revealed.#
Fig. 58 also illustrates the staged changes as well as the commit message.
Push commits to origin#
Now that we have recorded our commits with git, there is one last thing to do: update the remote repository. We can do this by pushing the commit, using the blue “Sync Changes” button shown in Fig. 40.
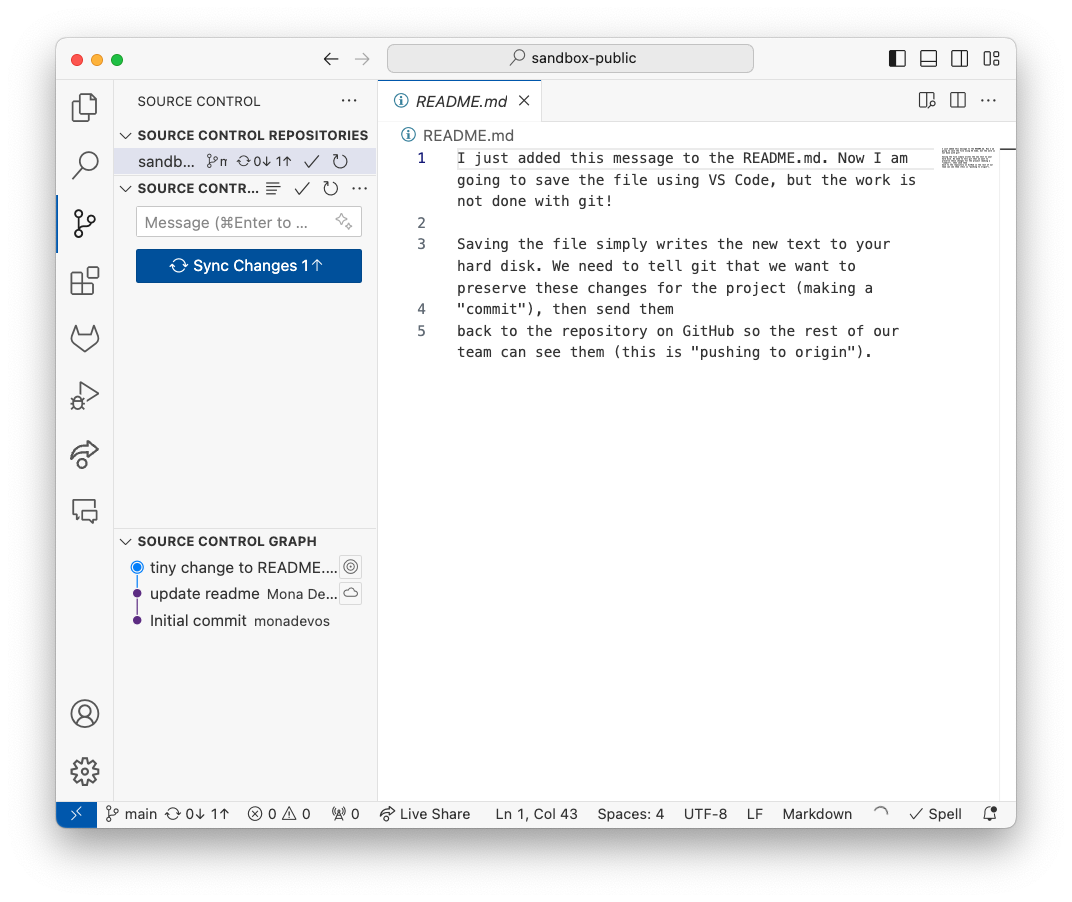
Fig. 40 Pushing the commits to origin, our remote repository, by syncing changes.#
What is “origin?”
Origin is the name git uses to identify the original remote repository where our local repository was cloned from. In our case: the repository on GitHub!
A closer look at our commits#
Now that we have pushed to origin, it is easy to confirm that things worked. First, we can see that in VS Code Source Control once again shows no changes, as in Fig. 41.
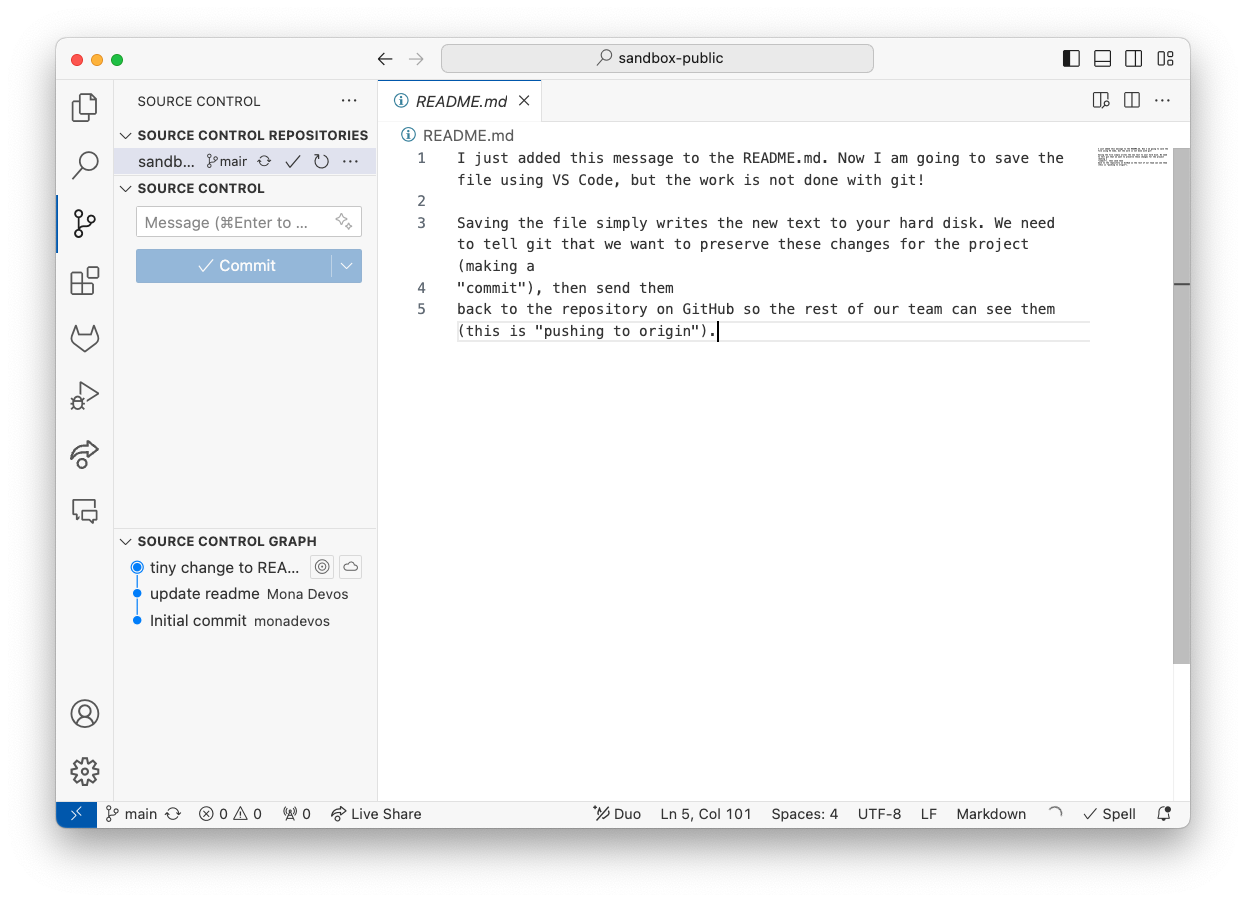
Fig. 41 View of VS Code Source Control with no local changes.#
In addition, we can check the remote repository directly. Visiting the home page of the repository is the best way to check the current status. Fig. 42 illustrates how this paged looked just after we pushed our commit to origin. As you can see the screenshot was made very soon afterwards (the “now” message), the commit message is visible, and we can see the actual change in in the text of README.md.
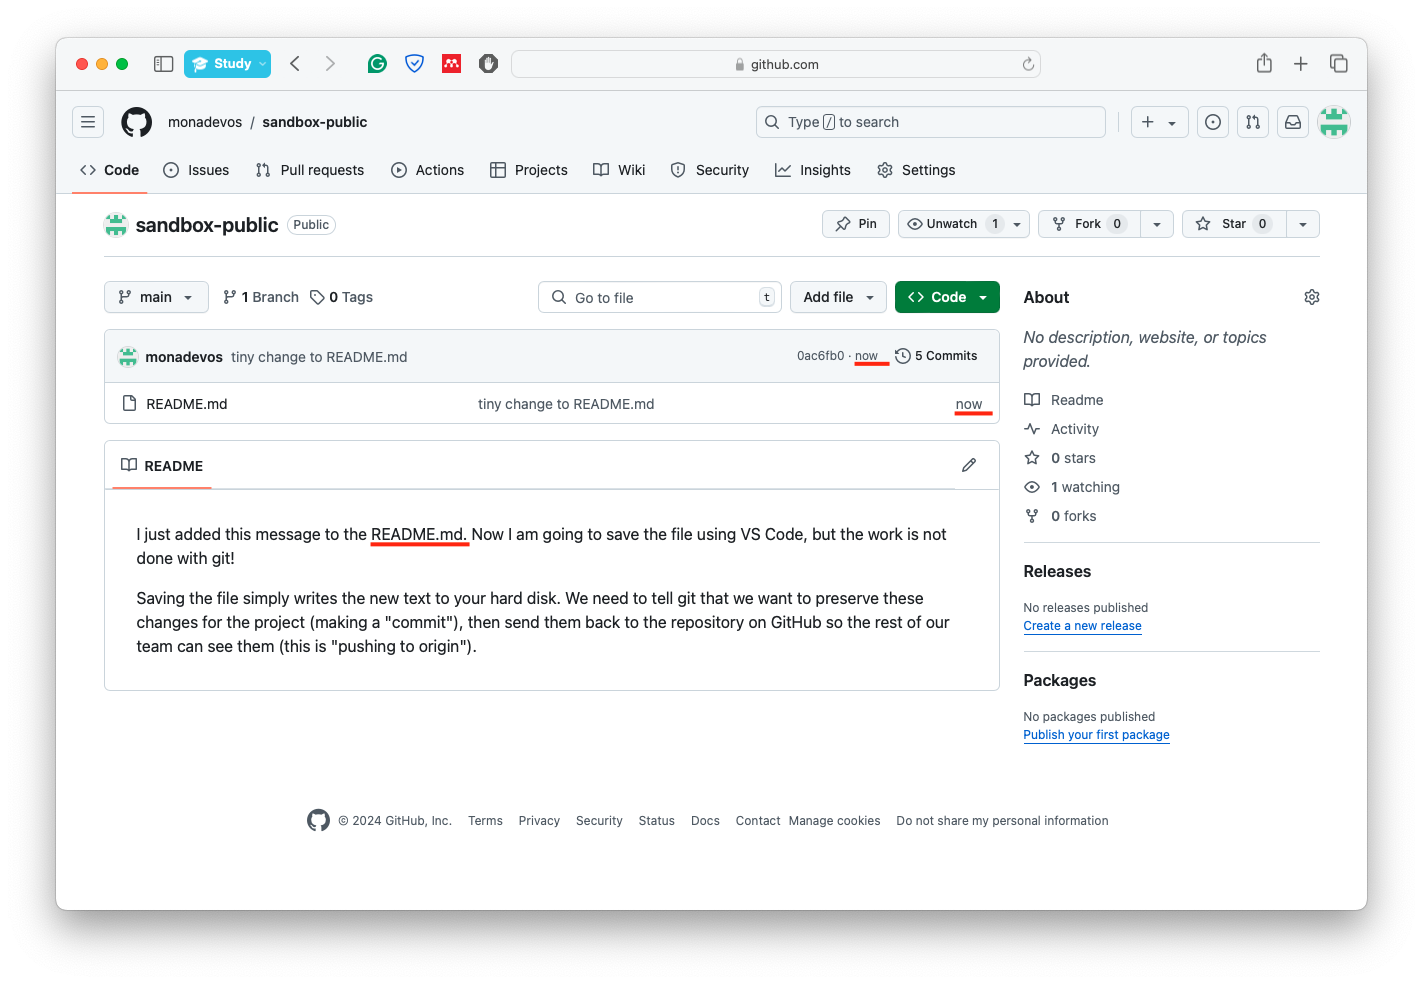
Fig. 42 View of remote repository (origin) on GitHub just after pushing, illustrating changes.#
By clicking on “commits” you can see all commits that have been made to the remote repository. Clicking on each commit will give an easy-to-read summary of the changes in each commit. For example, the first and second commits made on this page can be viewed here and here.