Miniconda Installation#
Miniconda is smaller version of Anaconda that is very quick and easy to install. Like Anaconda, it contains the essential tools to start working with Python: conda, Python and a few related packages. You can read more about it on the Miniconda website.
The screenshots in these instructions were made using the Command Prompt on a Windows Operating System (screenshots are from Windows 10). Where needed, instructions and notes for Mac users are provided in addition.
Tip
Unless you have installed Anaconda or Miniconda recently (e.g., within the last 2-3 years), we recommend you completely remove older versions of these software distributions from your computer and start from scratch. While it is possible to upgrade them, in our experience it is usually faster and less problematic to simply reinstall.
Download and Installation#
As described on the Miniconda website installer page, Miniconda can be installed by running the following in the Windows Command Prompt:
As described on the Miniconda site, these three commands quickly and quietly download the latest 64-bit Windows installer, rename it to a shorter file name, silently install, and then delete the installer.
Open the command prompt by searching for cmd in the start menu.
curl https://repo.anaconda.com/miniconda/Miniconda3-latest-Windows-x86_64.exe -o miniconda.exe
start /wait "" miniconda.exe /S
del miniconda.exe
Tip
Note that depending on your Windows settings CTRL+V does not always work; you may need to use the menu bar of the terminal window or right-click and select paste. In addition, the paste feature typically works one line at a time, therefore after the first line is executed (download) you may need to hit enter once or twice to complete the last lines, as they may not execute automatically.
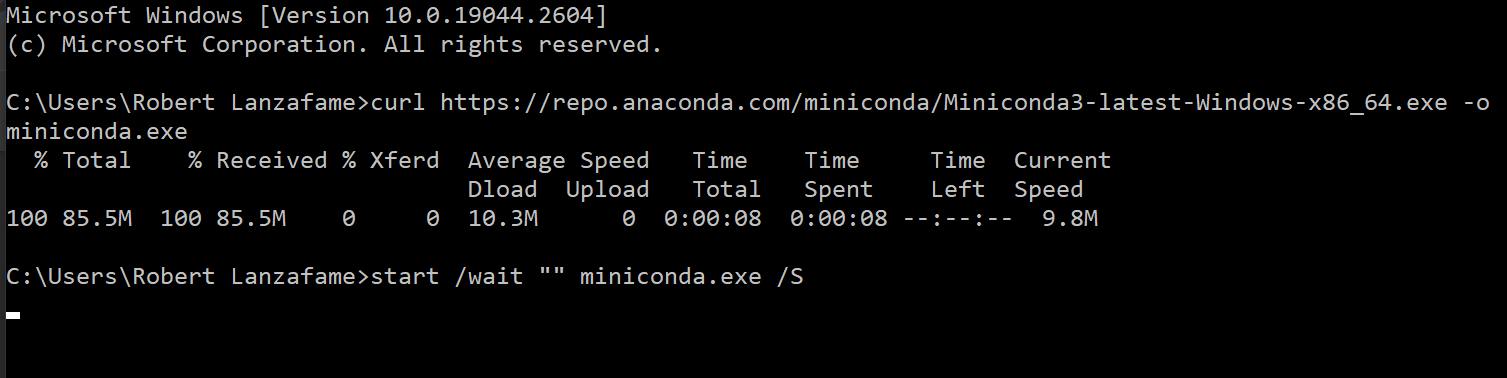
Fig. 19 Command line installation of Miniconda (Windows).#
Make sure conda.exe is available on your system PATH
On a Windows machine the Command Prompt doesn’t know where to find the executable file conda.exe you just installed. You can resolve this in two simple steps: 1) find the location of conda.exe on your computer, and 2) add the location to the PATH environment variable.
These two steps are described below
Find the location of
conda.exeon your computer.
The executable file conda.exe is what allows you to run the command conda from a CLI. The default location of this file is in your computer user settings: C:/Users/<your user name>/miniconda3/. Inside this folder you should see a number of files, one of which is a subdirectory ./Scripts/; inside this folder are a number of executables, one of which is conda.exe. Therefore, the complete path to conda is usually this:
C:\Users\<your user name>\miniconda3\Scripts\conda.exe
Tell your computer how to find
conda.exe
This is described on a separate page: environment variable instructions for Windows OS.
As described on the Miniconda site, these four commands download the latest M1 version of the MacOS installer, rename it to a shorter file name, silently install, and then delete the installer. This can be done from the terminal.
You can open Terminal by navigating to Applications > Utilities > Terminal or by searching for “Terminal” using Spotlight Cmd + Space.
Or you can use your terminal in VS Code.
mkdir -p ~/miniconda3
curl https://repo.anaconda.com/miniconda/Miniconda3-latest-MacOSX-arm64.sh -o ~/miniconda3/miniconda.sh
bash ~/miniconda3/miniconda.sh -b -u -p ~/miniconda3
rm ~/miniconda3/miniconda.sh
Check Whether Installation Was Successful#
Before moving on, you should verify that the installation worked properly. A “successful” installation implies that the conda application is accessible on your CLI; this is required for some IDE’s to work properly (e.g., VS Code).
The easiest way to check if everything worked properly is to make sure that the conda command line tool can be found and executed on your system, which can be done by opening the command prompt and typing conda --version (note the two dashes, --, not one, -!). Depending on your operating system and CLI; the following code snippet illustrates the command and response in Windows Command Prompt:
C:\Users\YOUR_USERNAME>conda --version
conda <YOUR_VERSION_NUMBER>
Note to Windows Users
There is a difference between the Command Prompt and the Anaconda version of the Command Prompt (Anaconda Prompt). Make sure conda is accessible on the “normal” Command Prompt. As it is made accessible in Anaconda Prompt by default during the installation process, it does not confirm whether or not conda is also added to the PATH variable for your computer.
Using Anaconda Prompt#
Now that Miniconda is installed on your system, from now on we will use the Anaconda Prompt instead of the windows command prompt; this way instructions will be identical regardless of whether you are using Windows or Mac OS!
Open the Windows tool bar and begin typing “Anaconda”. You should soon see two options appear: “Anaconda Prompt” and “Anaconda PowerShell Prompt.” There two versions are based on the two primary CLI’s on Windows: Command Prompt and PowerShell. Unless you are an experienced PowerShell user, we recommend using the Command Prompt version: Anaconda Prompt (see figure below):
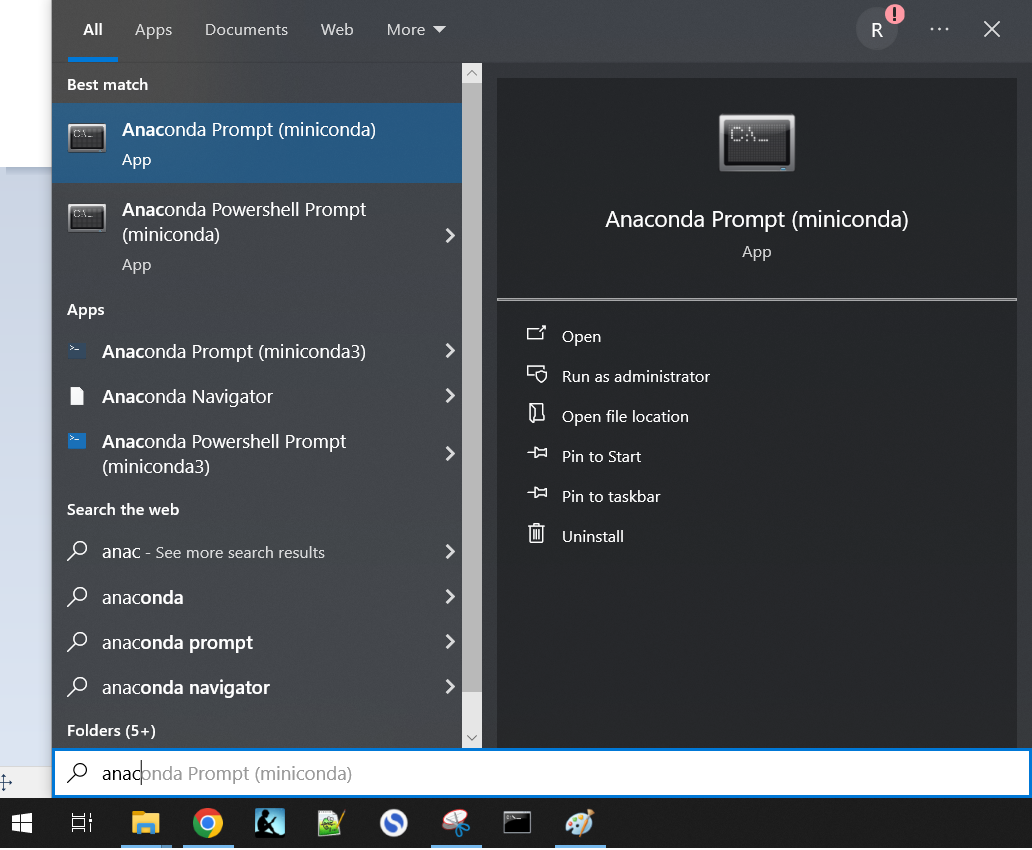
Fig. 20 Open Anaconda Prompt from the Windows menu.#
For Mac users this is all made a bit easier. You can just use your Terminal to interact with Anaconda.
To activate your Conda environment(by default your base environment) use the following command:
conda activate
You can now use conda and all the packages within it!