Interacting with a remote repository#
As you might have noticed, in this tutorial we have only interacted with a local repository up to now, without any possibility of collaboration with other people. In order to do so, we require a remote repository that is hosted somewhere. For example, on GitLab/GitHub/BitBucket instance. Lucky enough, TU Delft has its own instance of GitLab, where we can make repositories.
Note
As a student you can only make a repository if you are inside your MUDE group. Without being inside it, you are not able to create repositories on your own!
Note
This tutorial assumes you have already set up an SSH key and linked it to your GitLab account, as described here.
Creating a remote repository#
Let us first begin by making a new remote repository on GitLab. We are given the opportunity to either create a new blank repository or create a repository from an existing project template or import an existing repository from another project (Fig. 99).
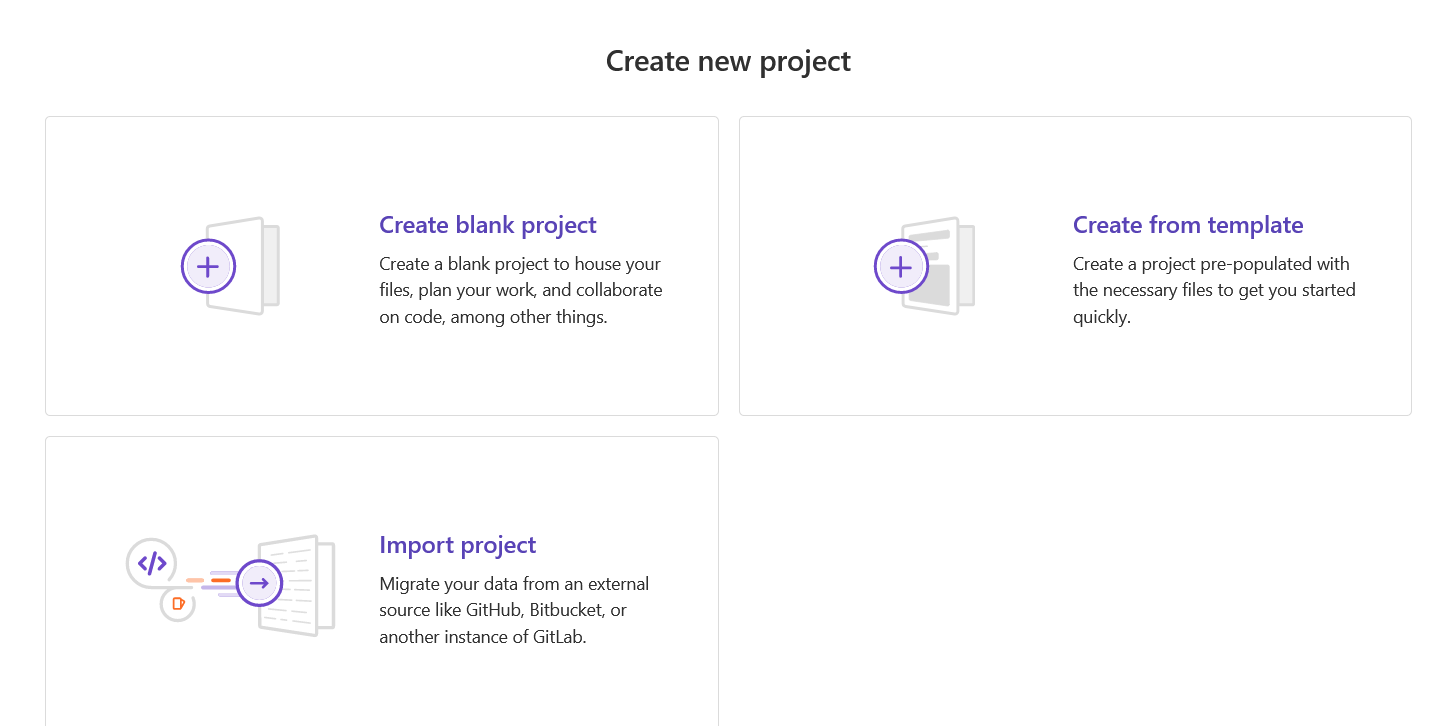
Fig. 99 Creating a new project#
We will start off by making a blank repository. Enter the necessary details such as project name and unselect the checkbox “Initialize repository with a README”, since it is better to create the README file ourselves (Fig. 100).
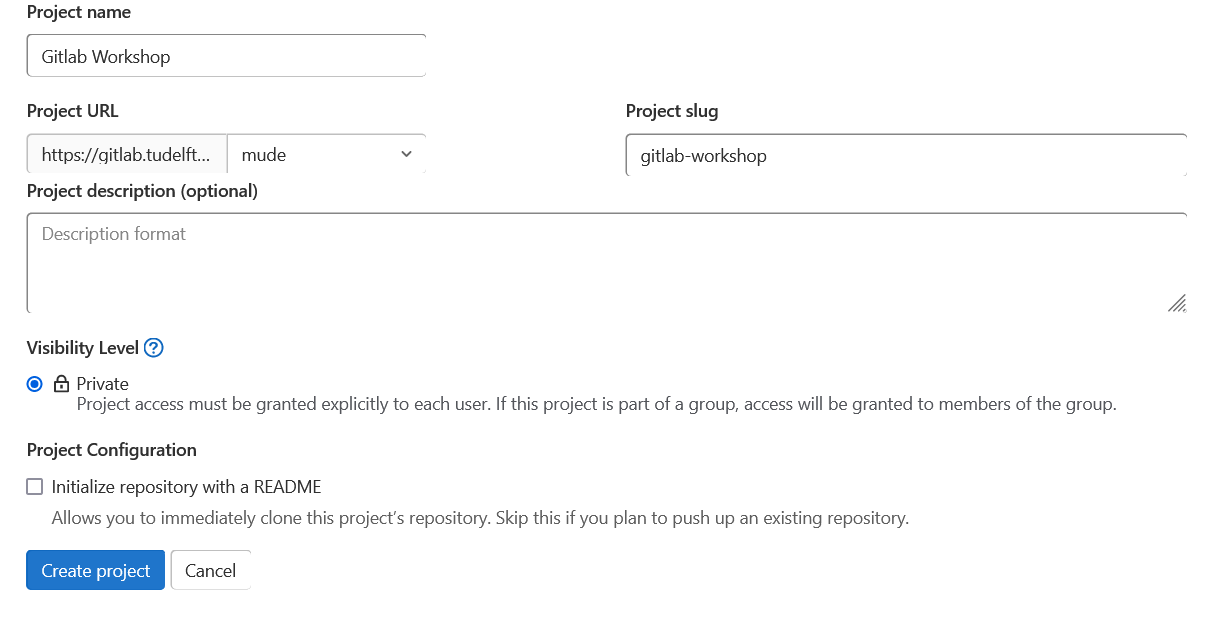
Fig. 100 Creating a new project - filling details#
Upon creating the repository, GitLab gives us a set of instructions to follow depending on what we would like to do (Fig. 101).
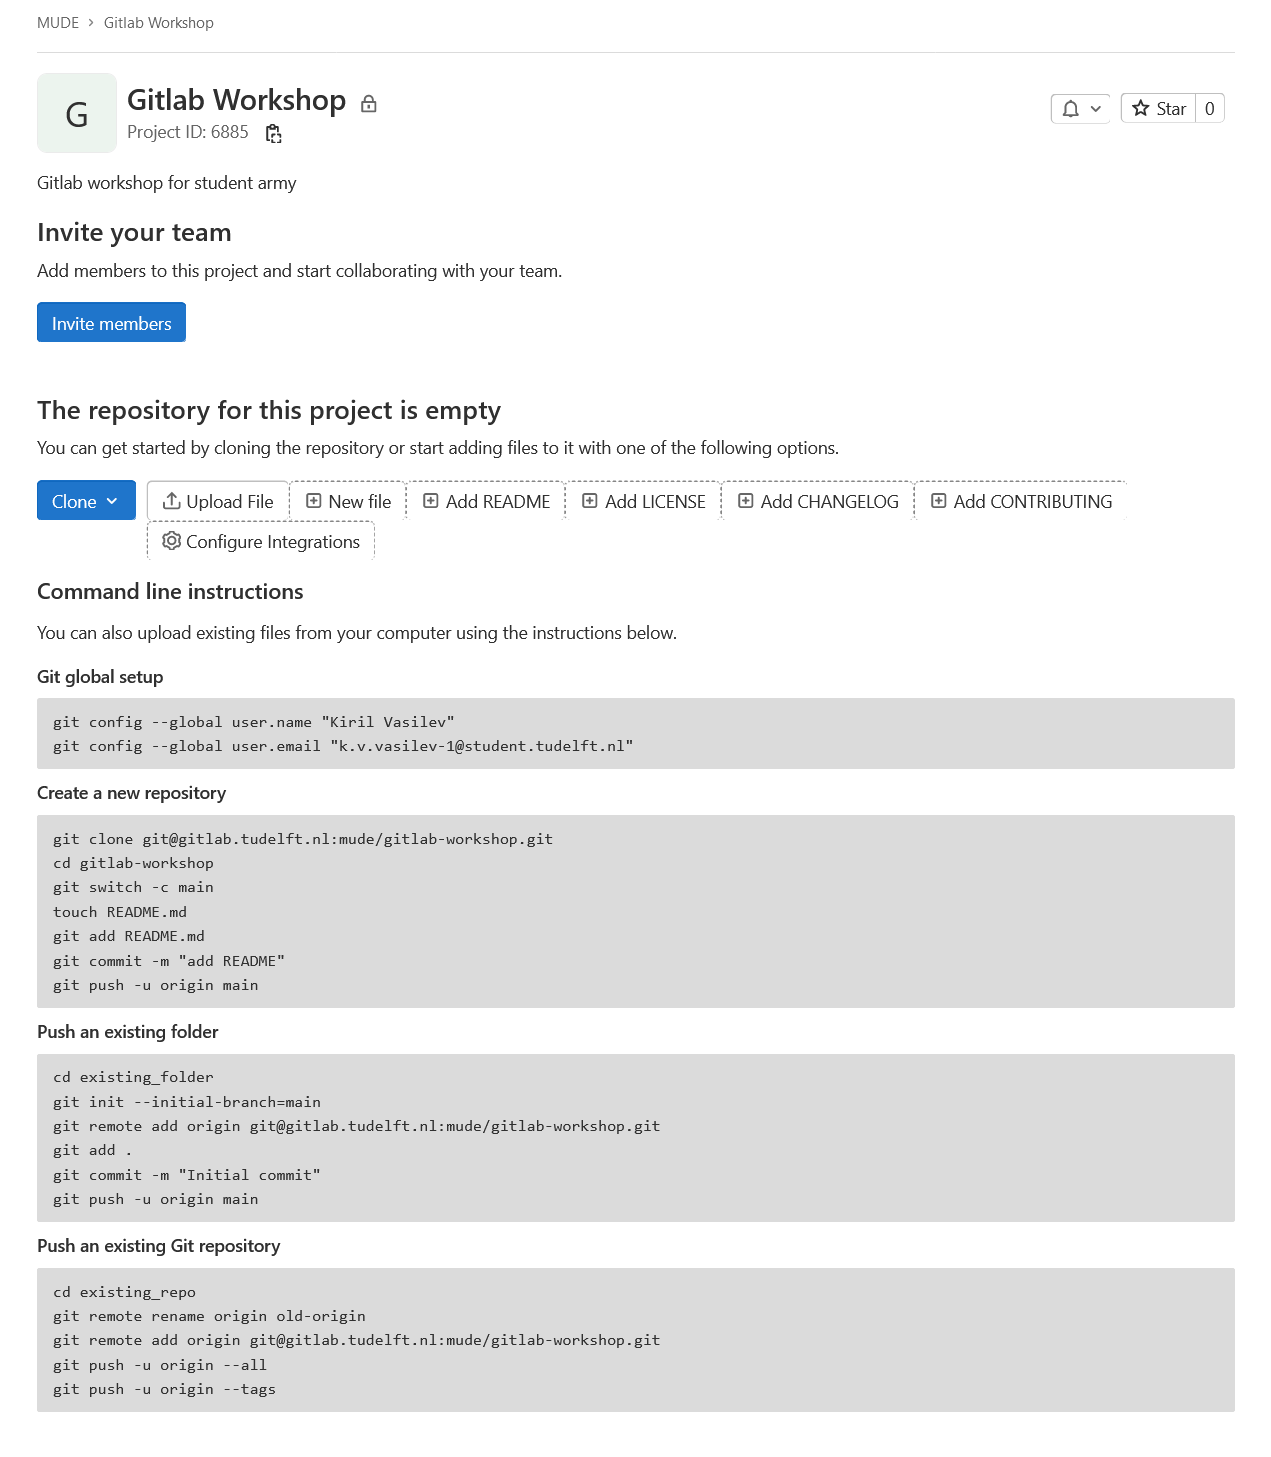
Fig. 101 Our new repository#
That was it! We have successfully created our own remote repository!
Setting up SSH agent#
At this point, you will need to use your personal SSH key, which you should have installed using the instructions here. If you were not successful, you will probably see something like the prompt in Fig. 102 when logged into your TU Delft GitLab account.

Fig. 102 SSH prompt on GitLab#
Note
You only need to setup SSH key once. You do not need to set it up for every repository!
If you are unable to setup SSH key, you can continue pushing to a remote repository, but you will be required to enter your NetID and password for every interaction.
You can test if your connection is successful by running
ssh -vT git@gitlab.tudelft.nl
If you do not get greeted by GitLab, you will most likely receive “Connection timeout”. This would mean that you have not set up your SSH key correctly. Ensure that you upload the public part of your key on GitLab, as described here.
Pushing to a repository#
Now that we have set up our SSH key, we are finally ready to push the repository we have been working on for the past couple of hours. We will follow the instructions provided by GitLab to push our existing repository. The first command will associate the current repository with the remote one and the second command will upload all our changes to the remote repository (Fig. 103).
git remote add origin git@gitlab.tudelft.nl:mude/gitlab-workshop.git

git push -u origin --all
Make sure you copy paste the commands above from your own remote repository on GitLab (Fig. 103)!
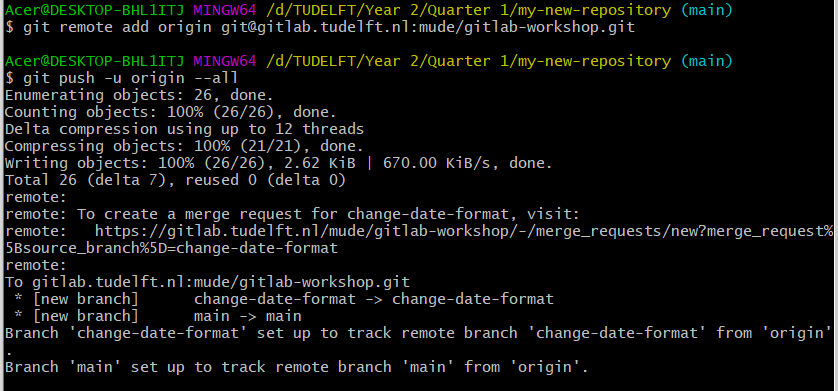
Fig. 103 Pushing local repository to GitLab#
Open the GitLab page of your repository and refresh the page. You should now see it there (Fig. 104).
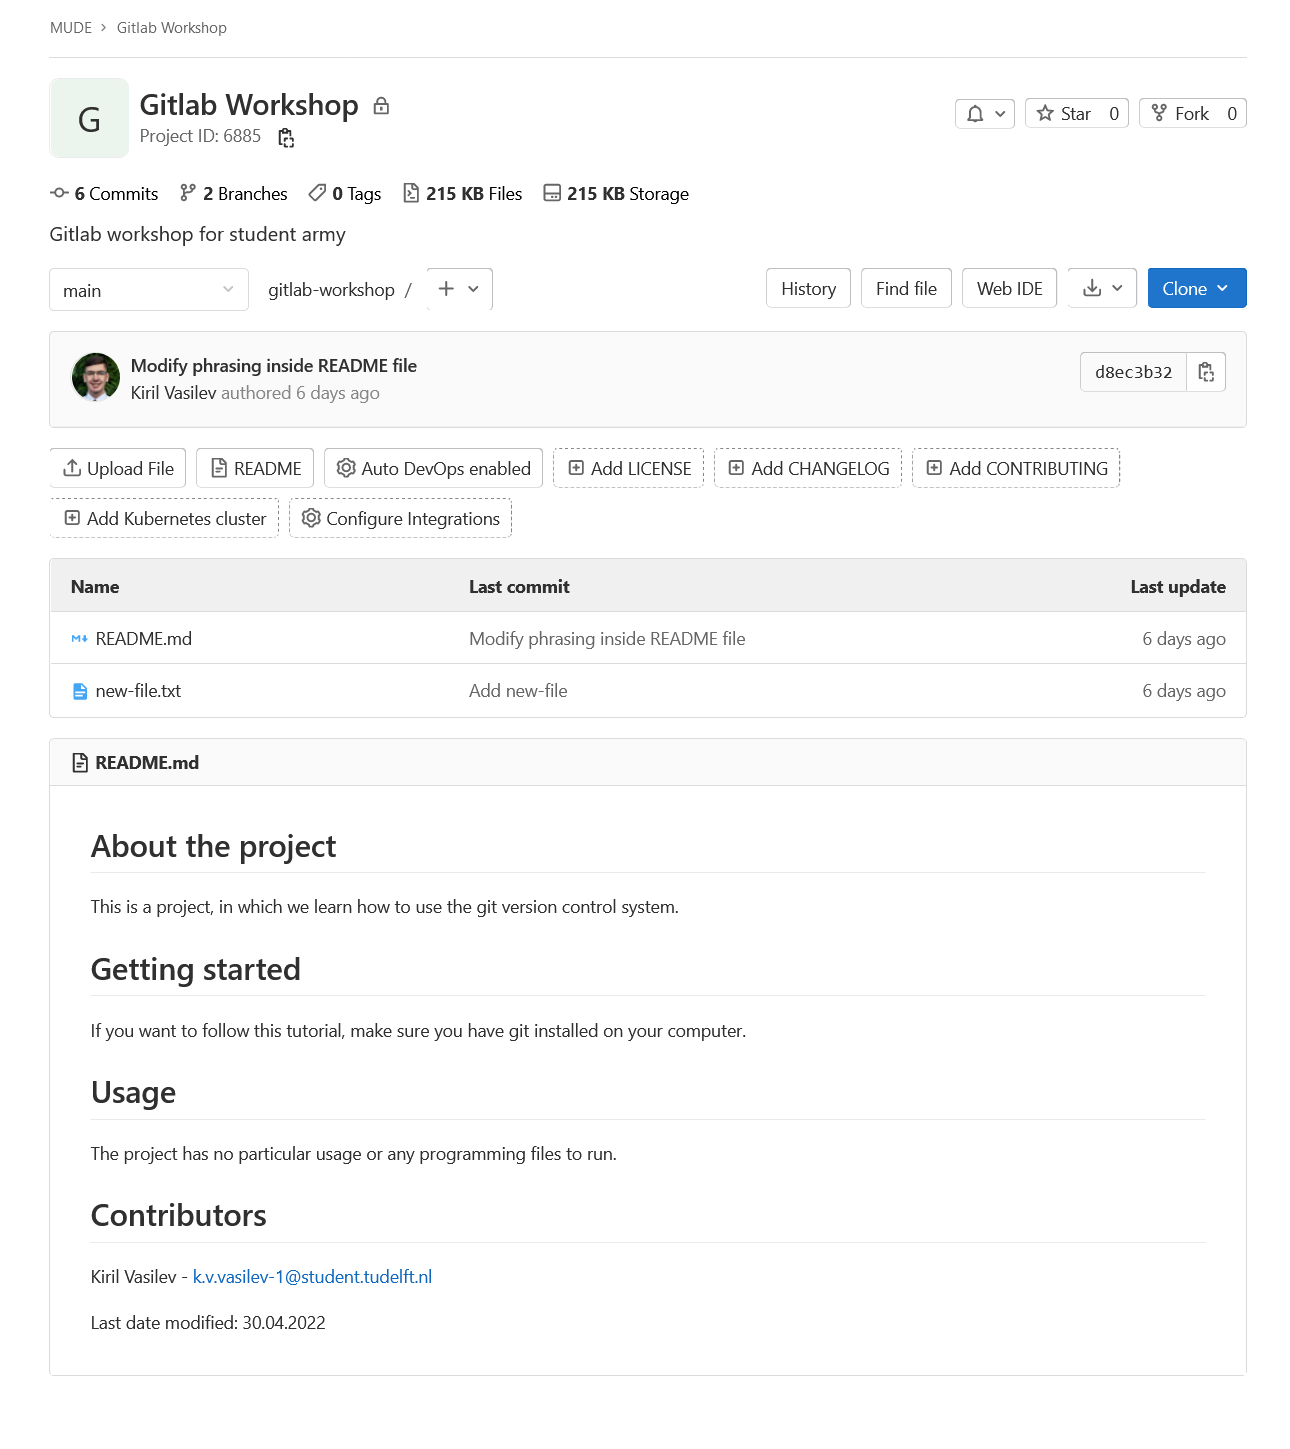
Fig. 104 Uploaded repository on GitLab#
Now we have pushed (uploaded) all our commits to the online repository.
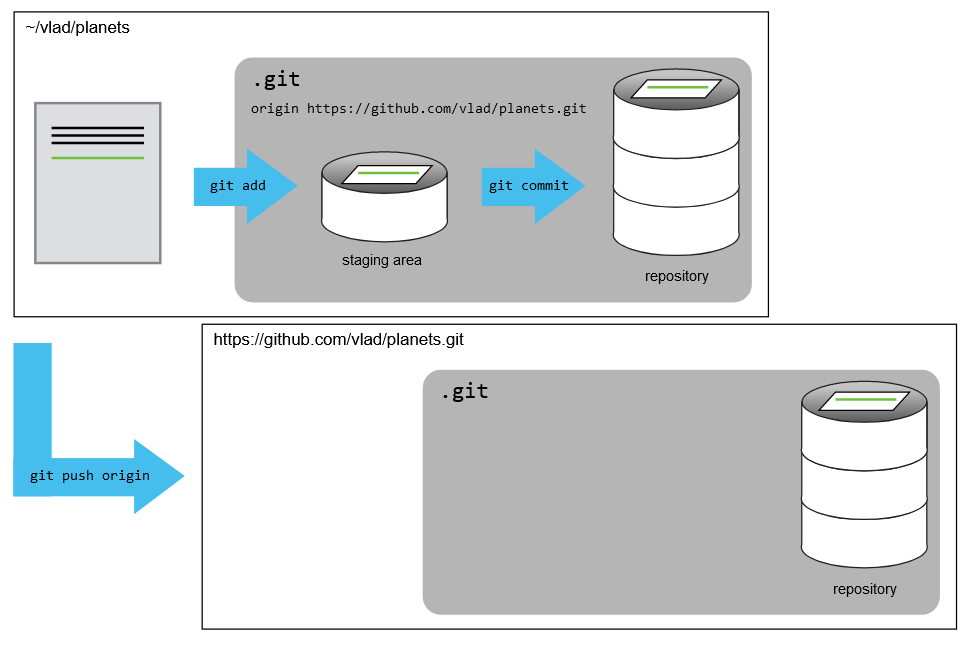
Fig. 105 Pushing to a repository#
Fig. 105 shows an extra step, which we have not discussed before, namely git push. This
command allows us to push local changes to a remote repository. To show
this, let us edit our “new-file.txt” file and add a single line, stage
the changes, commit them and finally push them (Fig. 106).
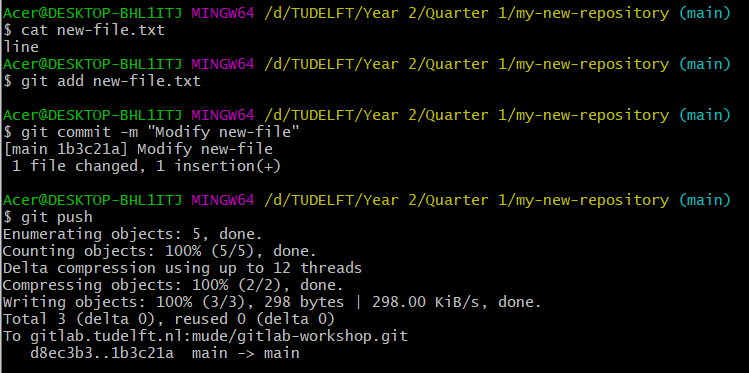
Fig. 106 Pushing the new changes#
On the GitLab webpage, we can verify the change has been pushed (Fig. 107).
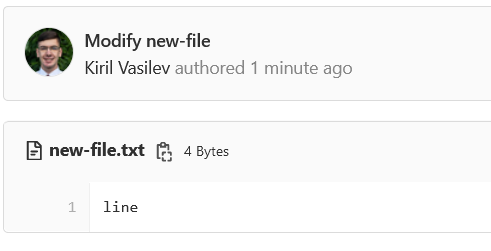
Fig. 107 Verify pushed commit#
Force pushing changes (Dangerous)#
Remember we saw that it is possible to reset commits. If your commit history does not match that of the remote repository, you will be unable to push changes. Sometimes it is necessary to overwrite your remote repository and delete things that used to exist. We strongly recommend that you take extra care when doing this, because it is possible for you to lose your progress. Moreover, force pushing can mess up other people’s work and cause a lot of trouble. Therefore, a better alternative as we discussed previously is reverting commits.
The command for force pushing commits on a specific branch is (replace
<branch_name> with the name of your branch):
git push origin <branch_name> --force
Fetching/Pulling from a repository#
When working with other people, it may happen that someone else has pushed something to the remote repository without your knowledge. In that case, you will need to pull their changes. For the sake of this exercise, to show how pulling/fetching works, we will first hard reset our branch 1 commit back to simulate this (Fig. 108).
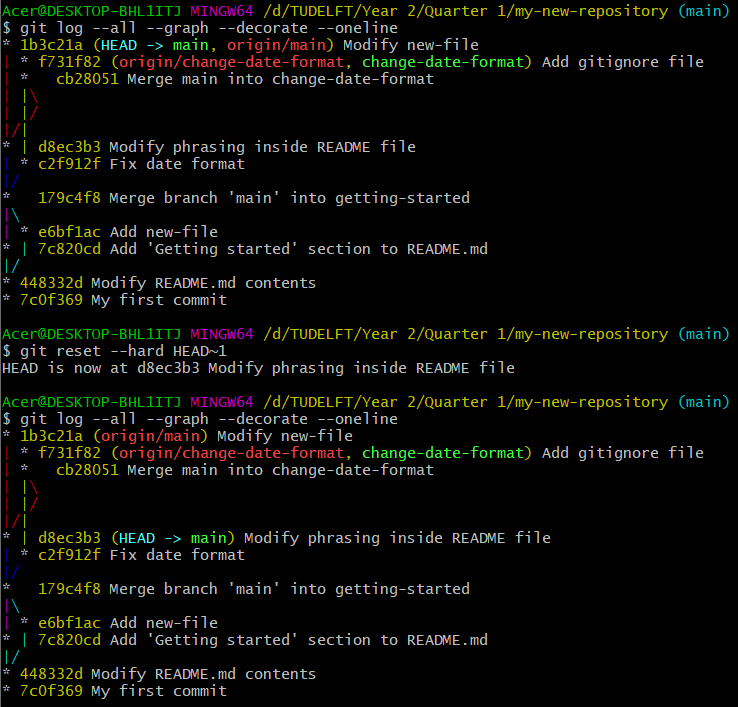
Fig. 108 Resetting local commit#
Notice that we were at main branch and that passed a parameter HEAD~1
when resetting the branch 1 commit back. This argument tells git to
reset to 1 commit behind HEAD. If we wanted to reset 2 commits behind
HEAD, we could have used HEAD~2.
Furthermore, notice that remote branches are denoted with red text and are preceded by origin text, while local branches are colored green.
There is a major distinction between fetching and pulling changes. Fetching will download all the changes locally but will not merge them yet. Therefore, fetching is useful to check the progress from the remote repository. Pulling on the other hand, will fetch and attempt to merge the changes to the local repository. If there is a conflict, git will alert the user and let them deal with the conflict.
Moreover, before committing and pushing changes, it is highly recommended to first check if anyone has committed on the remote repository before doing so. Otherwise, you will be unable to push to the remote, because it has a different commit history compared to the local.
Use git fetch to fetch changes and git pull to pull changes from
remote repository (Fig. 109).
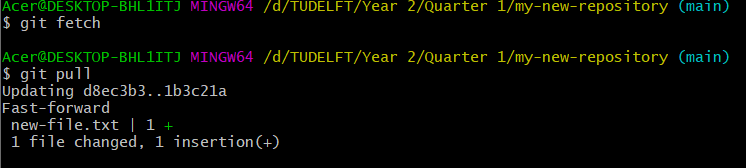
Fig. 109 Fetching from remote#
Cloning existing repository#
Suppose that we had no local repository and we wanted to work on the remote repository (which we created ourselves). In order to do this, we need to clone the remote repository before we can start working on it.
Open the GitLab webpage of your repository and press “Clone” and copy the “Clone with SSH” textbox. You can also clone using HTTPS, but that may require you to write your NetID and password every time you push or pull changes from the remote repository (Fig. 47).
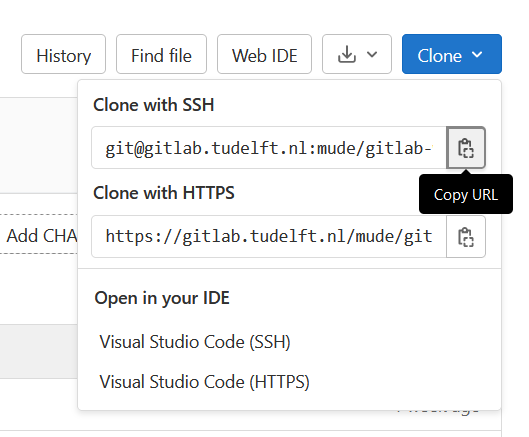
Fig. 110 Copy repository url#
Next make a new folder, where you wish to place the repository (Fig. 111).
Note that it is not mandatory to create a new folder. You can clone a repository in an existing folder as well.
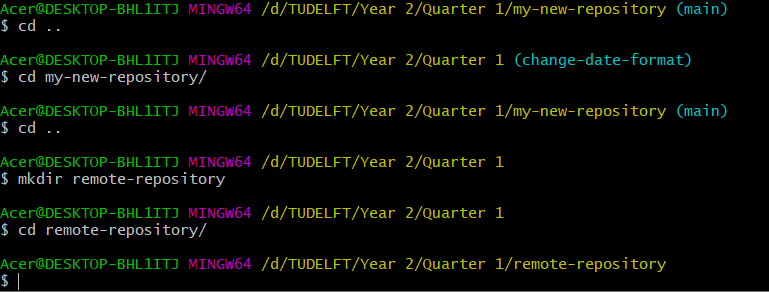
Fig. 111 Creating a new folder#
Next, run the git clone command and provide it with the SSH link you
copied (Fig. 50).
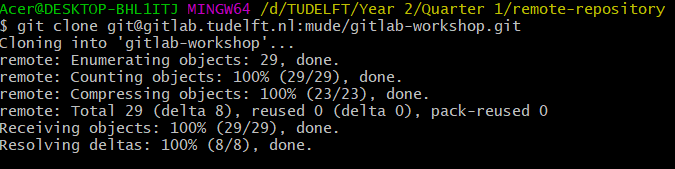
Fig. 112 Cloning a repository#
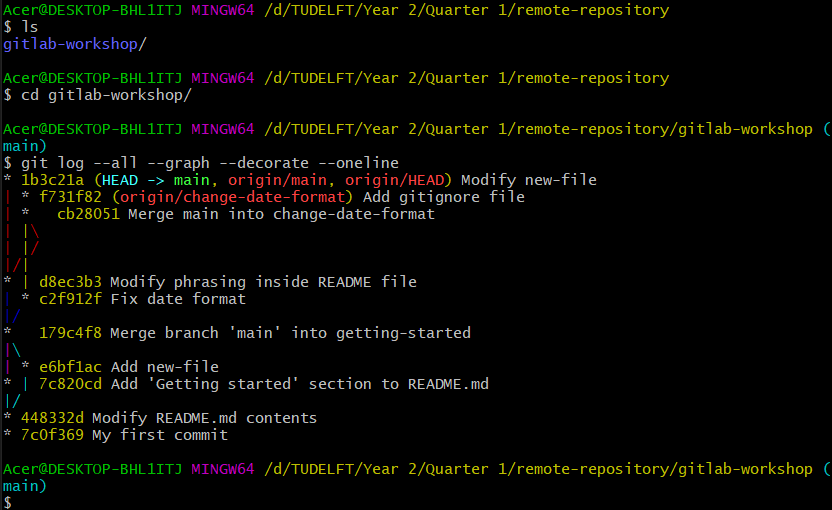
Fig. 113 Inspecting cloned repository graph#
We can observe that we have successfully cloned the repository (Fig. 51).
Notice that we have no local branch for change-date-format. To make
one, we need to run the following command (Fig. 53):
git checkout -b change-date-format origin/change-date-format
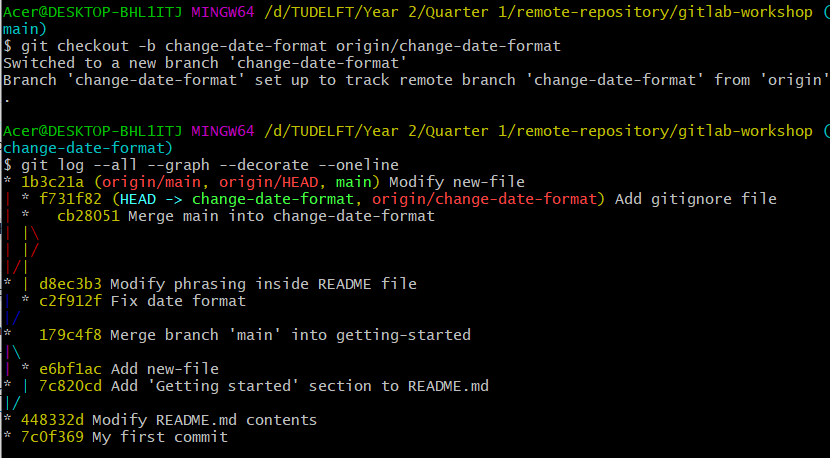
Fig. 114 Checkout a remote branch#
As the output by git suggests, now the local and remote branches are tied together. Therefore, if we make commits on our local version of the branch and push them to the remote repository, git will know to which branch to append those changes.