The Rest of the 2022-23 Workshop#
Note
This page was not shared with MUDE students in 2023-2024 (year 2).
It may have been a new page, or a modified page from year 1.
There may be pages in year 1 and year 2 that are nearly identical, or have significant modifications. Modifications usually were to reformat the notebooks to fit in a jupyter book framework better.
Tracking changes#
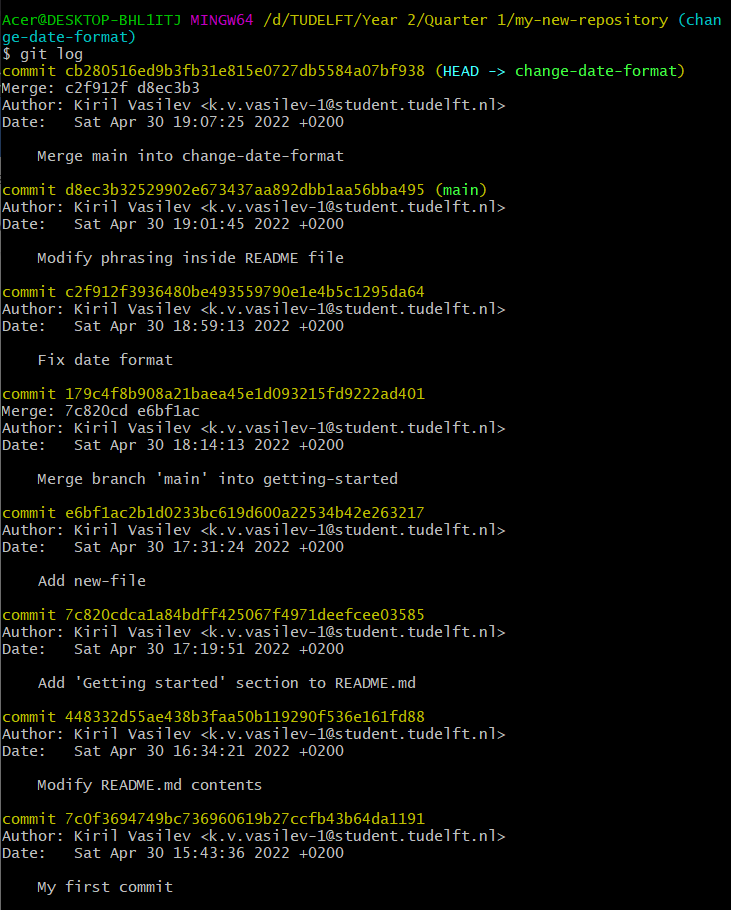
Git log#
We have previously mentioned the command git log, which gives a list
of all commits.
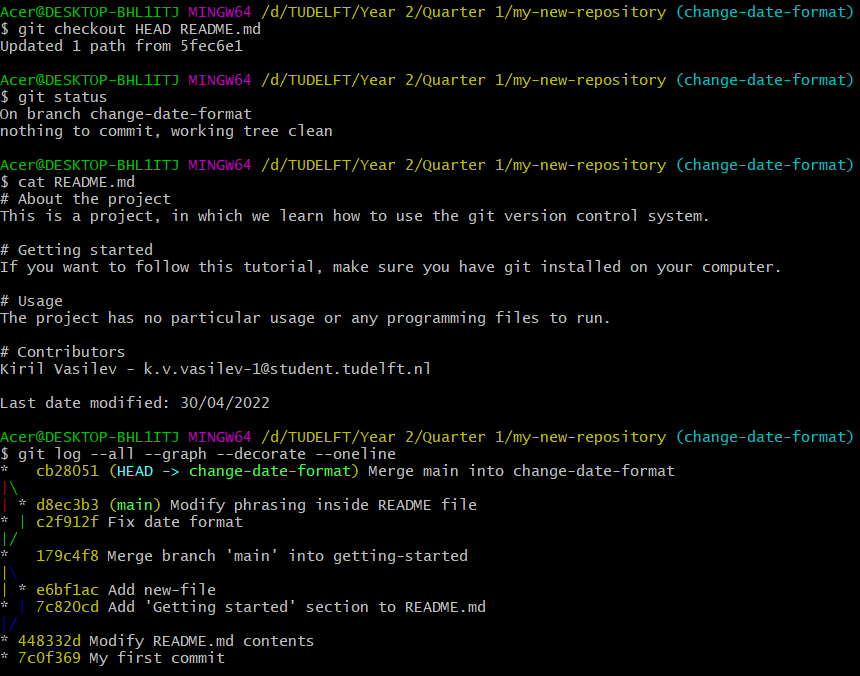
Git checkout – recover old versions of a file (Optional)#
Suppose that we are unhappy with our changes on README.md and wish to return to a previous version, namely the one in commit 448332d. We could use the following format to achieve this:
git checkout 448332d README.md

Notice that because we included file name in the checkout command we have returned to a previous version of the file, however, we have not moved in the commit timeline, and we remain on our previous position in the graph.
Notice that the file has new changes which are already included in the
repository as a staged commit (to see the changes use
git diff --cached). These changes thus appear as ‘new’ changes but are
in fact based on the older version of the same file. If we want to keep
this version, we can simply make a commit.
Git checkout – cancelling staged and unstaged changes (Optional)#
Suppose that we no longer deem them necessary and wish to cancel all of them for README.md file. We can run the following command to delete our changes and restore the file contents to its most recent commit – the commit HEAD points to:
git checkout HEAD README.md
As previously mentioned, we do not move in the commit timeline since we have neither staged our changes nor moved in branches.
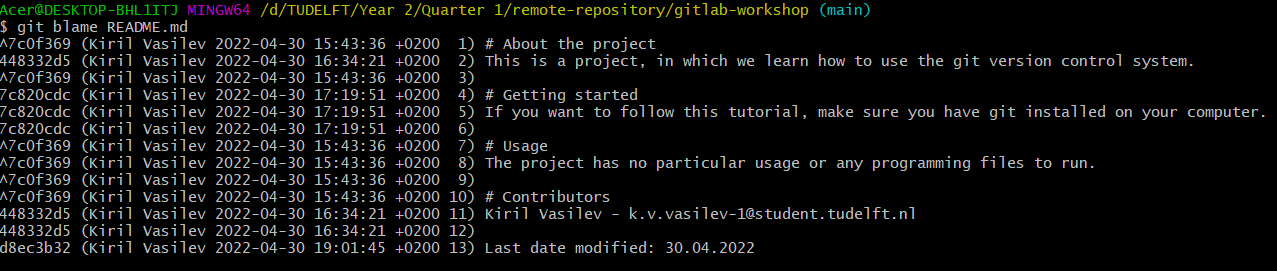
Git blame (Optional)#
Another way to track who modified a specific file is via the command
git blame <file>, where in <file> you put the file name and
extension that you want to check. This way, you will get line-by-line
information of who modified the line last, when and in which commit.
Reverting changes#
While working you may also end up in a situation where you make some changes and commit them, but you are no longer satisfied with them and wish to revert them. Here we will present a different command than the one used in .
This can be done via the following command, where <commit_id> should
be the id of the commit’s changes, you wish to revert:
git revert <commit_id>
Pay attention to the fact that reverting commits that constitute a merge is more difficult than reverting normal commits, because it is necessary to add more arguments to the command above: you need to specify when reverting to the changes, to which parent commit you wish to revert. This situation is shown in the image.
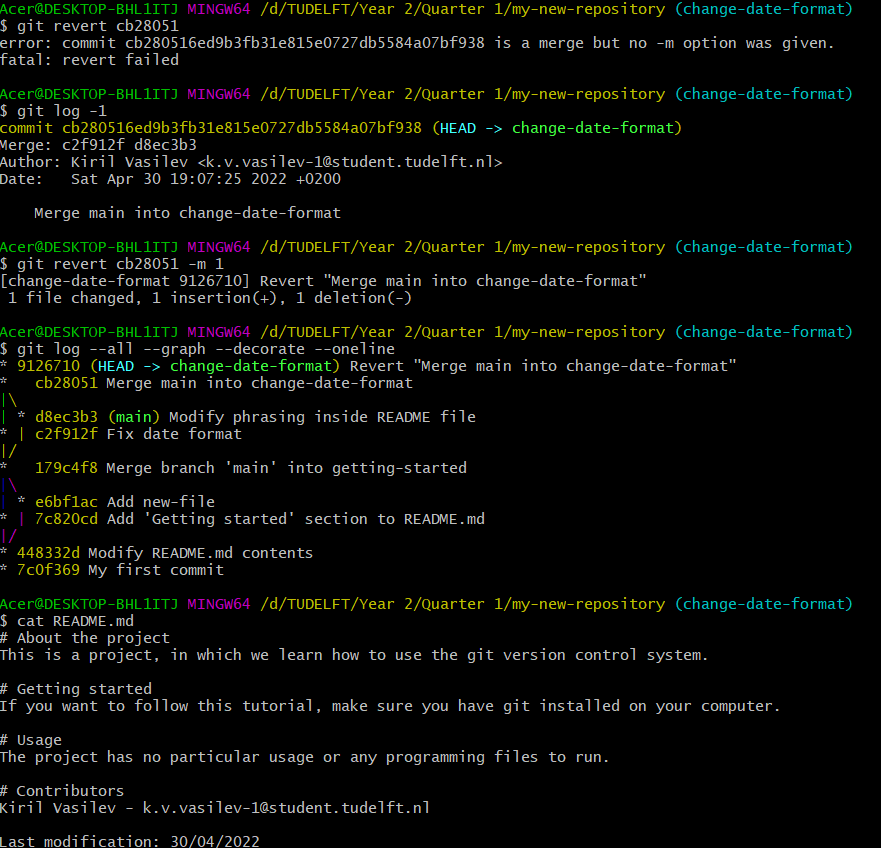
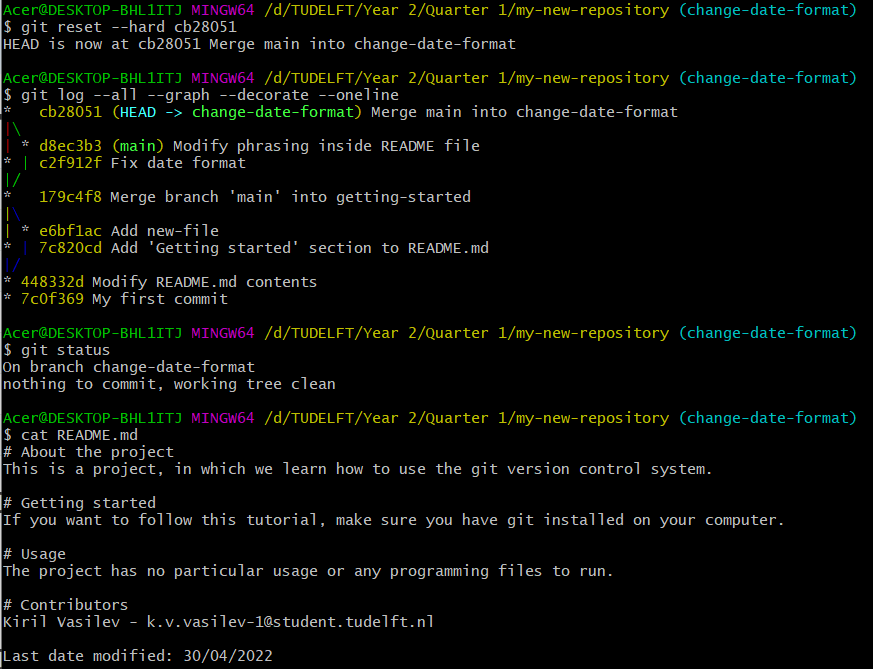
When executing the git log command with argument -1, we can get the
most recent commit. Since that commit is a merge commit, it has 2 parent
commits: c2f912f and d8ec3b3. Therefore, we can choose to which
parent commit to revert to by passing an argument -m 1 to the
git revert command (we decided to revert to the first commit
c2f912f).
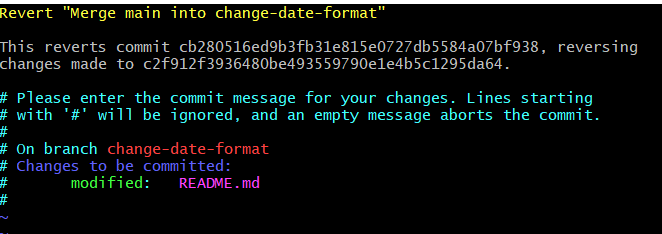
When typing the command above a text editor window will open to modify
the commit message. If you wish to make no changes to the message, just
write :x to close it.
Since git is a version control system, when reverting changes, we are making a new commit for that. Run the command for graph visualization to verify this.
Resetting changes/branches#
Reverting changes does not alter the timeline of previous commits on a particular branch — it simply creates a new commit. Resetting, on the other hand, does alter the timeline. Resetting commits requires extra care as you have the power to reset the entire repository and the power to alter the commit history without leaving a clear record of what the changes were.
git reset command comes with 3 types of arguments that you can pass to
it:
--soft – equivalent to uncommiting the changes. This way the changes
to the file(s) will not be deleted and will remain staged. Hence,
running git commit afterwards can let us commit all the changes
immediately (and thereby undoing the soft reset if we made no additional
changes).
--mixed – equivalent to uncommiting and unstaging the changes.
Therefore, contrary to --soft, we need to first stage changes and then
commit them (if we wish).
--hard – equivalent to uncommiting, unstaging and deleting all
changes. This is the most dangerous of the 3 options as it can
completely alter the commit history and leaves no record of previous
changes to the file(s).
In order to show its power, we will reset the revert we did in the previous section and leave no trace of it happening. Note that we also pass as an argument the commit we are resetting to.
Stashing changes (Optional)#
Suppose you are working on something which is not ready yet and a friend of yours asks to check his branch and what he has done there. However, if you switch branches, you will either carry over your changes or cause a conflict and git will not allow the checkout. In this situation, it is best to stash your changes, that is save them without staging or committing them, and return to them later.
This is possible using the command git stash save <name>, where
<name> depicts the name, you give to your stashed changes. Let us make
some changes to our README.md file and stash them. Note that when you
stash your changes, you remove them and store them for later use.
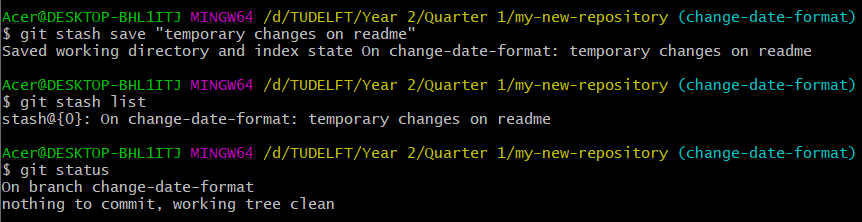
We can use the command git stash list to get a list of all stashes.
Notice that every stash is associated with an id next to it, which is
modified every time we save or pop a stash.
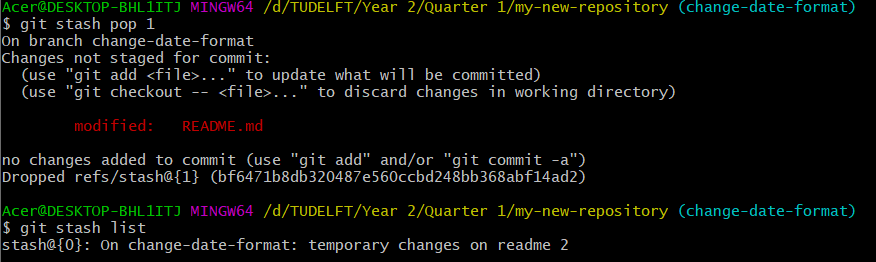
We will make a few more changes to the file and stash them again. The list of stashes will grow as a result as seen below.

We can now safely move to other branches and when ready return to the
current one and unstash the changes. This is possible via this command:
git stash pop <index>, where <index> is the index of the stash we
want to unstash. We have decided to unstash changes on index 1. Popping
the stash will effectively remove it from the list of stashes.
We may also choose to delete a stash without using it. Using the
following command to achieve this: git stash drop <index>.

GitIgnore#
Sometimes it happens that you wish to have some files in your repository that you do not want to share with others (do not want to ever commit and stage). For example, database-related files or some cache files left by the applications you are using to develop your projects. The best way to ignore those files is to instruct git to ignore them for you. Hence, if git knows that it should ignore a given file, it will no longer suggest you to stage/commit changes to that file.
Another example of files you should not commit are the .DS_Store
files, which are only generated on MacOS platforms.
Suppose we want to ignore all files of type png. Suppose that we also
wish to ignore a folder and all its contents called data, which we will
create now. In order to do so, we need to create a new file called
.gitgnore. Notice that the file has no name and has extension gitignore
(normally we can use ls to list files, but since
those beginning with a ‘.’ are generally hidden we pass the argument –a
to list all files.


To instruct git to ignore that file and everything inside that folder, we must modify the contents of our gitignore file to contain the following (where ‘/’ indicates all files in the directory ‘data’ and the ‘*’ symbol is a wildcard to ignore all files with extension ‘.png’). Note that you can open the gitignore file as a normal text file to modify it (using a text editor app).
data/
*.png

We would first need to commit our gitignore file to come into effect and ignore files and directories.

The changes are no longer tracked (the images and files in the data
folder cannot be staged). This can be verified by using git status.

Another advantage you get is that git will not let you stage a file, which you have specifically set to be ignored by git .

Depending on the projects you work on, there already exist pre-made templates for gitignore files that you can make use of. Just make sure that you pick a gitignore file that matches the language you are working on and/or the IDE (integrated development environment) you are using.
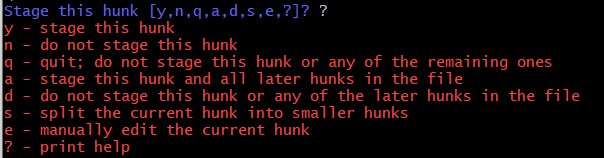
Interactive commits (Optional)#
So far when we wish to commit changes to a file, we were only able to
commit all of them. However, sometimes, we may wish to commit only some
of the changes. This can be done by passing an argument –p to your
git add command.

You will get an overview of all the changes in your file and git will
ask you at every step what you wish to do. Use ? to get an explanation of what each option does. A hunk denotes a block of
changes (such as the one in the image above). Git allows you to split
the hunk into smaller hunks until a hunk becomes as small as 1 change.
We have decided to split the hunk into smaller hunks and stage only the second, fourth and fifth hunks and leave out the first and third).
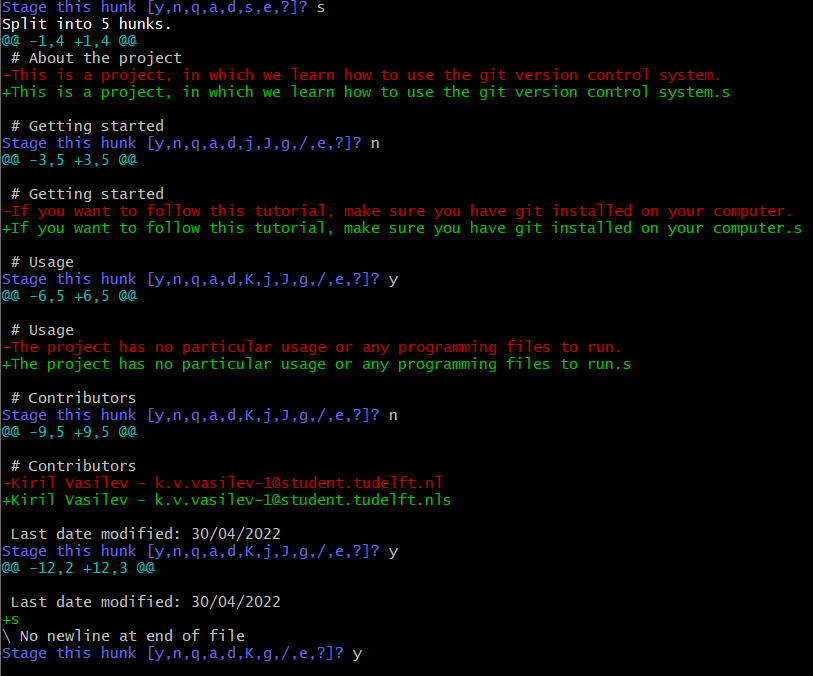
We can verify that we have successfully achieved this by calling
git diff --staged to compare the HEAD with the staged files – only
second, fourth and fifth changes were staged .
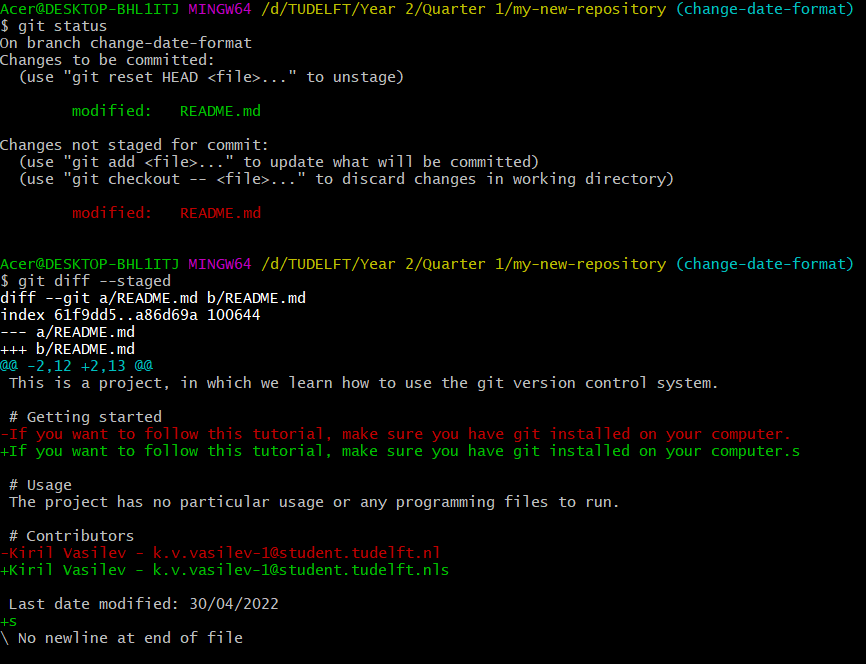
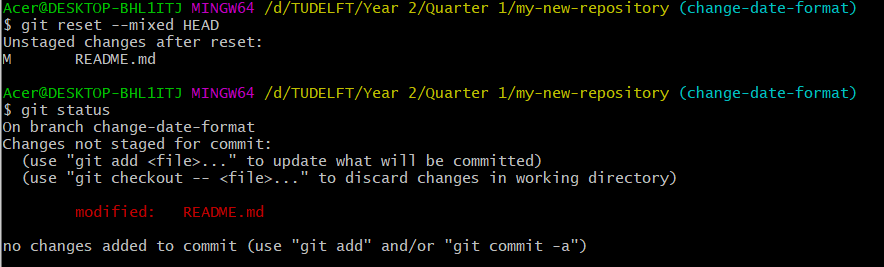
Of course, since those changes contain mistakes (extra s at the end of 3
sentences), we can reset them. We use the --mixed argument to unstage
the changes, but not delete them.
You can also commit part of the staged changes (the same way as we did
with staging only selected lines) by passing the –p parameter to
git commit command.
Common mistakes using Git#
While working you may end up making one of the following mistakes, so make sure you double check you are executing the correct commands and that you know what you wish to do:
Merging from the wrong branch
Committing on the wrong branch
Resetting more than you wanted
Committing the wrong file or changes
Giving a wrong branch name
Writing a commit message with a mistake in it
Deleting the wrong branch
Et cetera.
GitLab videos#
On top of this tutorial, there are 2 videos, which show the Basics and Advanced parts (optional) of using GitLab.
GitLab basics: https://youtu.be/H23G1582d1o
GitLab Advanced (optional): https://youtu.be/B7syxptEnZ0. Note that in the advanced part of the GitLab tutorial, we present how Merge Requests are made and handled. The steps to achieve this are very similar to the steps you took during the PEP8 peer-review assignment.
Aliasing commands (Optional)#
This section of the workshop is optional.
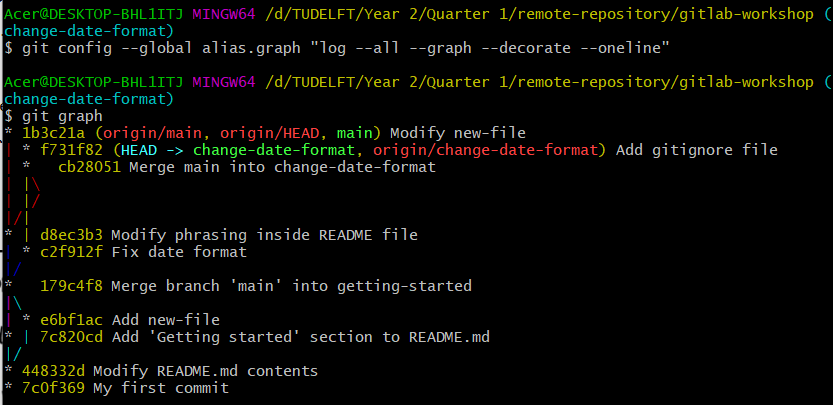
You may be feeling fed up with writing this long command to visualize the commit graph. This can easily be fixed by introducing an alias for it. Namely, you can set up an alias called graph for it. Hence, you can replace the long command with a shorter one called git graph:
git config --global alias.graph "log --all --graph --decorate --oneline"
Try using git graph afterwards to verify it worked.
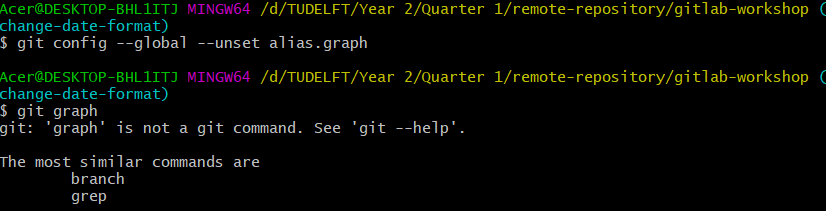
If you wish to remove an alias, simply execute the following:
git config --global --unset alias.graph
Conclusion#
At first glance, Git has a steep learning curve and requires a lot of knowledge and time to spend learning and practicing. However, knowing how to use Git will pay off in the future! We hope that you found this tutorial useful. Make sure you return to it occasionally when you are in doubt about something. Remember that you can always Google things to learn more. What is more, this tutorial is not exhaustive, but covers the required basics of Git, which should be sufficient for you to work in group projects.
Finally, in case something goes wrong, remember to follow the instructions
References and used resources#
While creating this tutorial, we made use of the following external sources:
Appendices#
In the appendices you can find commonly used Git and Bash commands. You may notice that we surround some of them with quotations (”) . These are only necessary when the argument you are passing on contains whitespaces. For example, this is usually the case in commit messages. However, if you have no spaces in your arguments, you can omit the quotations.
Appendix A: Commonly used Git commands#
Table with commonly used Git commands:
Explanation of git command Git command Example
Initialise repository git init git init Add files to the staging area git add git add “README.md” Commit changes git commit git commit –m “Add README.md file” Merge the changes from one branch to another git merge git merge “development” Get a list of all commits git log git log Get an overview of who was the last one to modify lines in a file git blame git blame README.md Show difference between commits (and/or files) git diff git diff 1234567 7654321 Create a branch git branch git branch feature1 Move to another branch git checkout git checkout feature1 Revert a commit git revert git revert 1234567 Store changes (without committing or staging) git stash git stash save “my-stash” Uncommit and unstage changes on a branch git reset –mixed git reset –mixed development Push changes to a remote repository git push git push Fetch and merge changes from a remote repository git pull git pull Fetch changes from a remote repository git fetch git fetch Clone a remote repository git clone git clone git@gitlab.ewi.tudelft/myrepository.git Associate current repository with remote one git remote git remote add origin git@gitlab.ewi.tudelft/myrepository.git List staged/unstaged/untracked files git status git status Set email used for commits git config –global user.email <email> git config –global user.email myemail@tudelft.nl Recover old versions of a file git checkout git checkout 1234567 README.md
Appendix B: Commonly used bash commands#
Table with commonly used bash commands:
Explanation of bash command Bash command Example
List files/folders in current directory including hidden ones ls –a ls -a Create an empty file touch touch README.md Create an empty directory mkdir mkdir “util” Enter a folder inside a directory cd cd util Leave a directory cd cd ../ Remove a folder rmdir rmdir util View the contents of a file cat cat README.md Clear the terminal contents clear clear Move a file or directory to a different location. Note that the first argument is location of folder/file to move and the second argument is the new location of it mv mv /c/util /d/