How to Tackle Pushing Problems#
Have you encountered a problem when pushing to your remote repository? This tutorial is to help wolve pushing problems when dealing with notebooks, specifically when a commit has been made to the remote repository that conflicts with the local repository. In simple language, this means the file online is different from the one on your computer and you can’t push the file on your computer to GitLab automatically.
Recommended Workflow
You can avoid having to use the technique in this page if you and your group members keep in mind a few simple good practices when working with git:
Always fetch and pull from the remote repository before starting a work session on your computer
Always commit and push changes to the remote repository after finishing a work session
Try to make smaller commits, and separate them when working on multiple files, especially if other team members are working at the same time. This makes it easier to resolve conflicts, if they occur.
Remember that this also comes about because we are using Jupyter notebooks. Resolving conflicts in files is easier with other text-based file types, but that is outside the scope of MUDE.
Introduction to the Problem#
Before we start, we should keep in mind why this happens. Firstly, notebooks are text-based files (JSON format) that should be easy for git to handle. However, when we run cells, the output is stored in the notebook, which can lead to challenges. For example, an image will be converted to a text block that encodes the color of every single pixel inside it. This can quickly become thousands of characters long, which makes it challenging to read.
Secondly, we know that git works by comparing text files. Thus, while it should be easy to compare notebooks, small changes can be very difficult to interpret. For example, you may rerun the code without making any changes to the notebook, but the image can be regenerated and then git will show you that thousands of characters have changed!
This is a problem because it becomes impractical to use git to work out the conflicts between files when making new commits in a repository. Note that we don’t cover it here, but this would normally be called a merge conflict.
For this situation we need another way to work out our problems, which is the subject of this tutorial.
If you are curious, you can see the source files used to create the screenshots for this tutorial in this repository.
Recreating the Problem#
Let’s assume we have a remote repository on GitLab that we have already cloned to our computer (our local repository). Fig. 70 illustrates a change we have made locally to the files README.md.
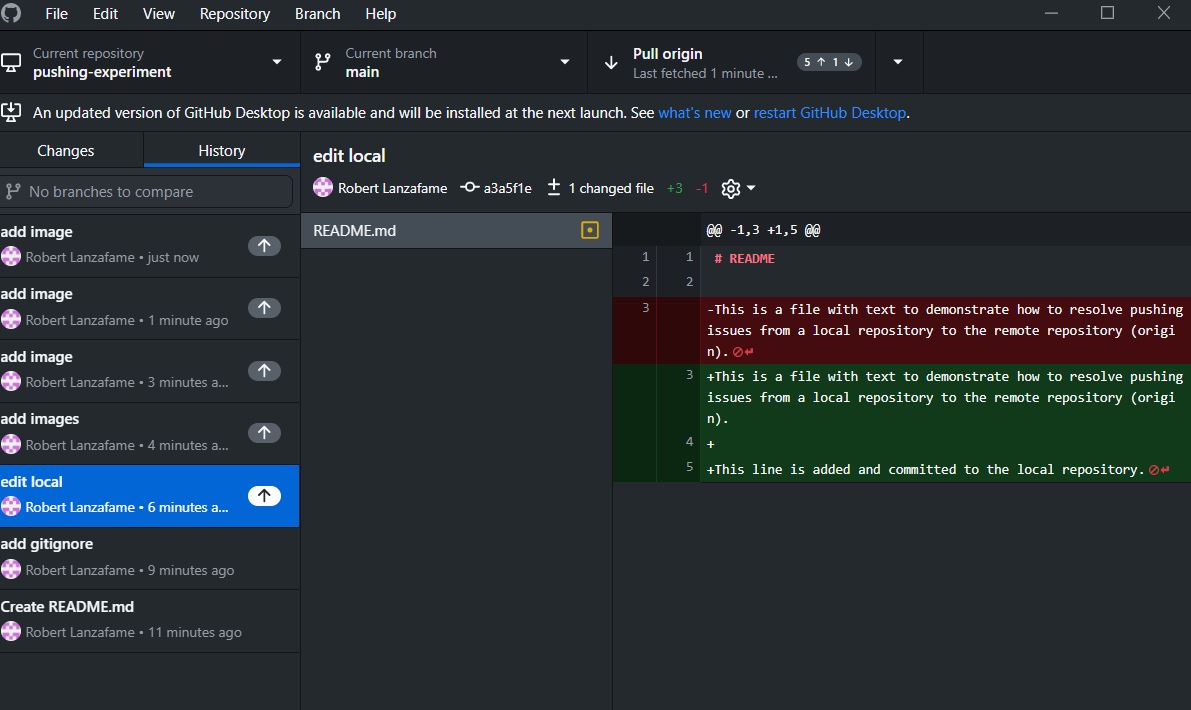
Fig. 70 README.md with change in the local repostory, viewed GitHub GUI.#
If you have made changes in the remote file (on GitLab), as illustrated in Fig. 71 and the local file (on your laptop), when you attempt to push your file to GitLab, an error occurs.
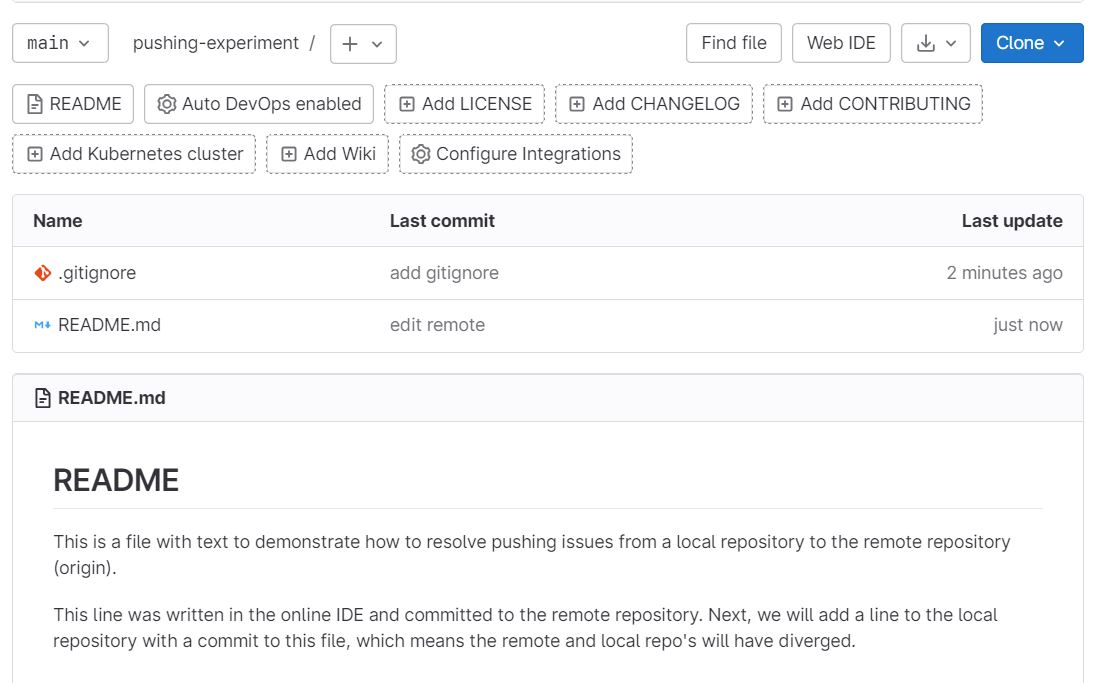
Fig. 71 An edit is made in the remote repository using the online IDE.#
Note
The two screenshots above represent two commits that were made to the repository, separately, to the same file. If the commits affected different files, there would not have beeb an issue.
In addition, if the commit from the remote repository had been fetched and pulled to the local repository before the edits to the file on the local repository were made, the whole problem would have been avoided. This is the ideal way of working, however, when working on collaborative projects, sometimes this is not possible. Hence the need for this tutorial!
Understanding the Error#
Now that the file has been changed separately in two different locations, we will see the error when trying to push the local commit to the remote repository: an error message will pop up:
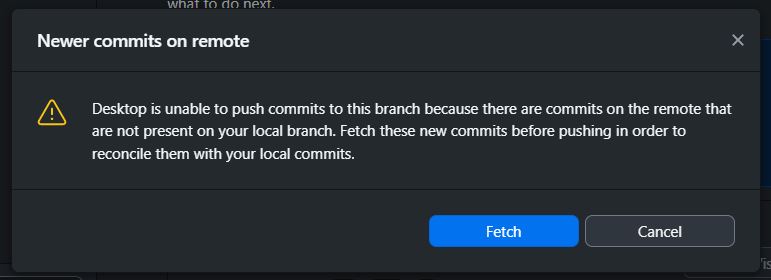
Fig. 72 Error message when pushing when the remote file has been edited.#
When clicking “fetch,” GitHub GUI gives a summary telling us exactly what is going on: the “commit on remote” is not on your machine!
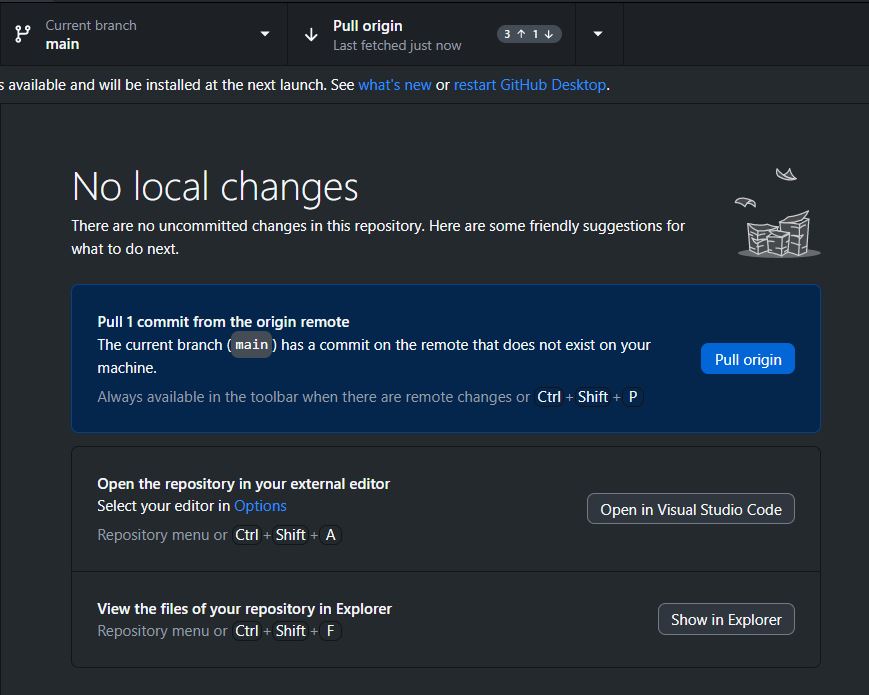
Fig. 73 The screen after clicking fetch, showing the issue#
In fact, if you click “pull origin” it asks you to resolve the conflicts.
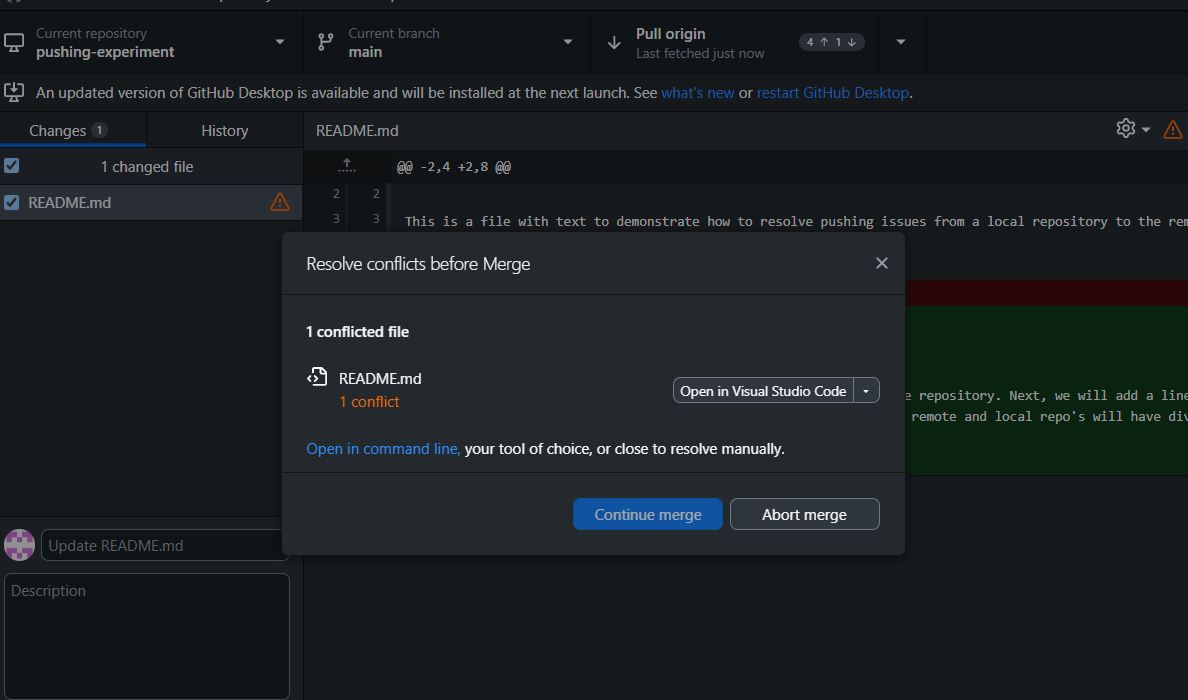
Fig. 74 Github GUI showing the conflicted file.#
When using notebooks DO NOT continue merge! Instead, click “abort merge”.
After aborting the merge, you can check out the view history to see exactly what is causing the issue (for examaple, Fig. 70), but assuming you know what changes have been made, this should be relatively easy to figure out.
The Solutions#
For now, there are 2 possible ways to solve this issue, depending on which of the two file versions you want to keep:
The either/or option: you do not care about the changes made to one of the file versions, either remotely or locally, and will simply choose one to use going forward.
The both option: you want to keep the changes in both file versions, and will combine the files manually.
Note
Remember, these solutions are explicitly written for solving merge conflicts when dealing with Jupyter notebooks, and assumes you have been working entirely on a single branch (main). You do not need to understand or work with branches to apply these solutions.
Option 1: Either/Or#
In this case, we will keep the changes as made locally and overwrite the changes made remotely. To do this:
click “fetch” and then “pull origin”
right click to get the situation as illustrated in Fig. 75
click “use the modified file from main”
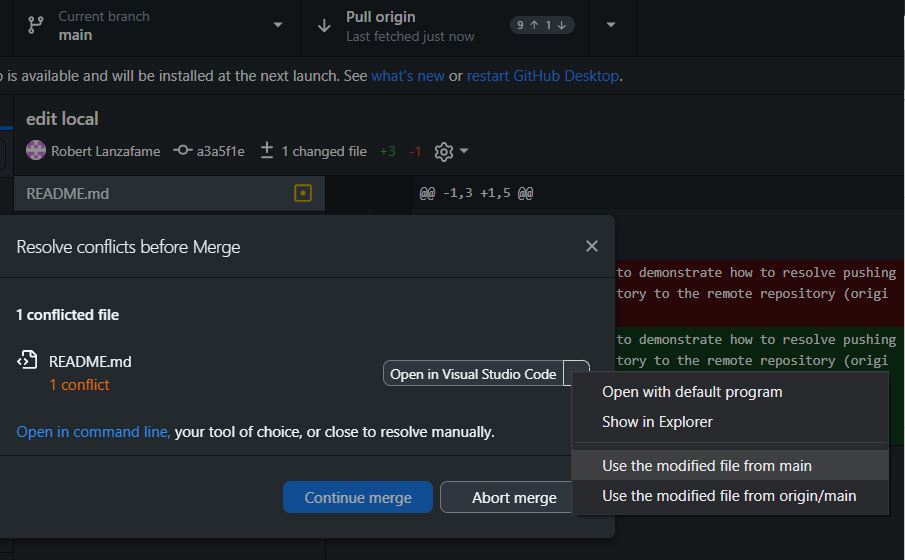
Fig. 75 Resolving conflicts using modified file from local copy of main branch`.#
Note
main is the local version of the file, whereas origin/main is the remote file.
After this you will get the following notification:
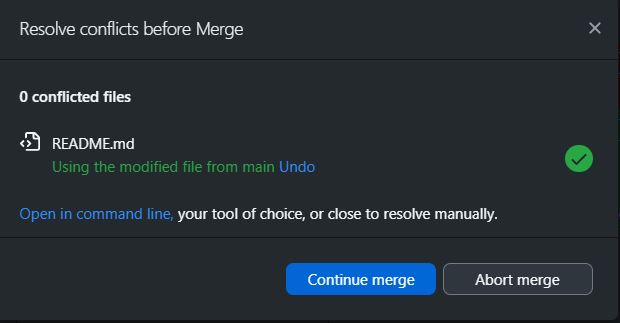
Fig. 76 Conflict resolved message.#
Now that the conflict has been resolved, you should be good to push the commits to the remote repository:
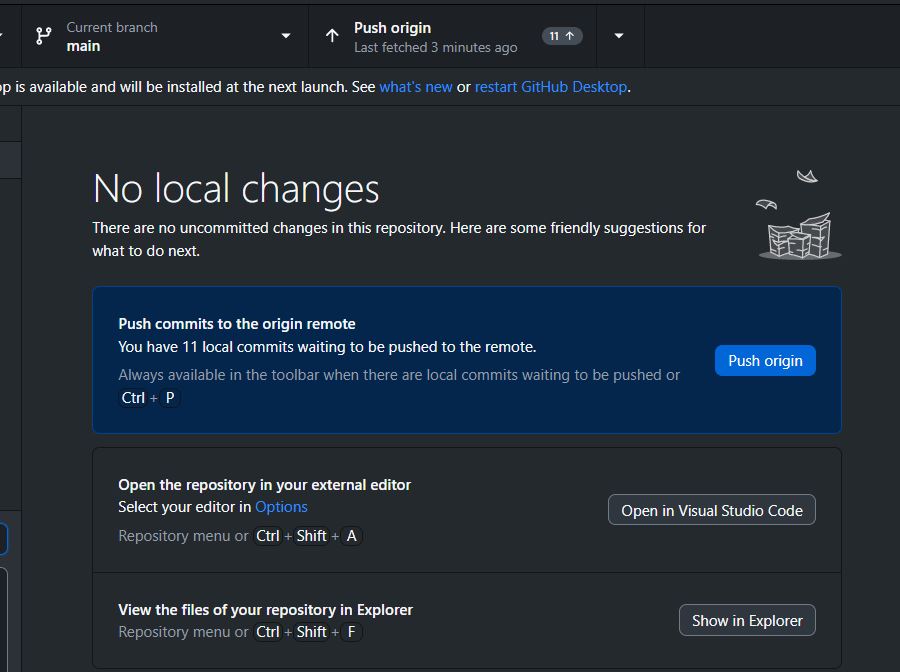
Fig. 77 After resolving conflict, you can push to remote.#
To confirm that things have worked as planned, via the GitLab website by clicking on the file and “history”, where you can see all the commits that have modified the file (within GitLab).
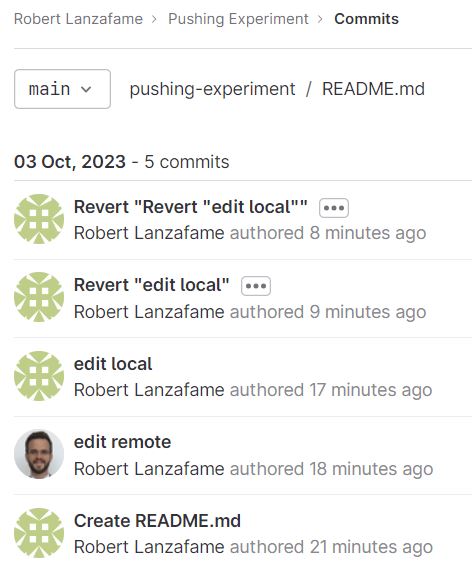
Fig. 78 GitLab showing commits in history for a particular file.#
Note that the meaning of “revert” changes is explained below.
Option 2: Save Both Files#
In this case we want to preserve some (or all) of the changes in both files. You know when looking at the history what the offending changes are.

Fig. 79 Github GUI showing the changed lines.#
Note that Fig. 79 makes the changes obvious, but this won’t always be the case when working with noteoboks. Luckily you can also understand the previous changes by looking at the commits shown in the changes list.
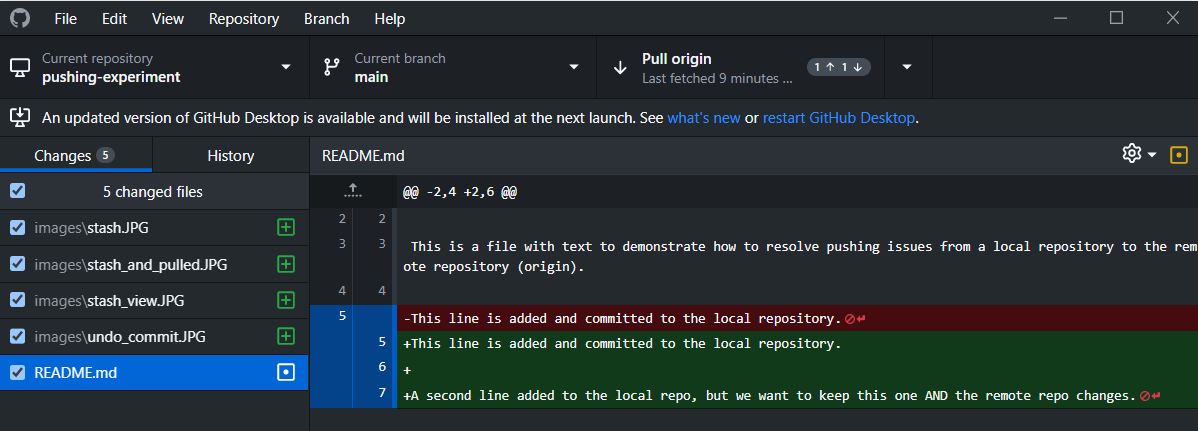
Fig. 80 Github GUI showing the changed lines in the changes list.#
You can see that other work has also been done with the notebook. Here it is important to identify the files that have been changed locally that must be preserved, but also are conflicting with the changes on the remote repository. Prepare the repository and files for combining manually by doing the following:
In the changes menu, select the changes to all files except the file with the conflicting edits, then commit those changes. This would be done by unchecking the box next to the
README.mdin Fig. 80. After making the commit, the changes menu should now only show the file with the conflicting edits.Copy the file with the conflicting changes to a directory outside of the git repository.
Pull the remote files to your local repository. Now you will have the file from GitLab in your local repository, which you should copy to the same directory as in the previous step; you will have to rename the file since the file with the same name already exists there.
Open both of the files in the editor of your choice and merge the contents manually (Fig. 81). When finished, you should have a single file with the original name.
Copy and paste the updated file back into your git repository (with the original name), then commit and push to the remote repository. You can delete the temporary files and directory.
Remember to check that the changes have been made appropriately in GitLab.
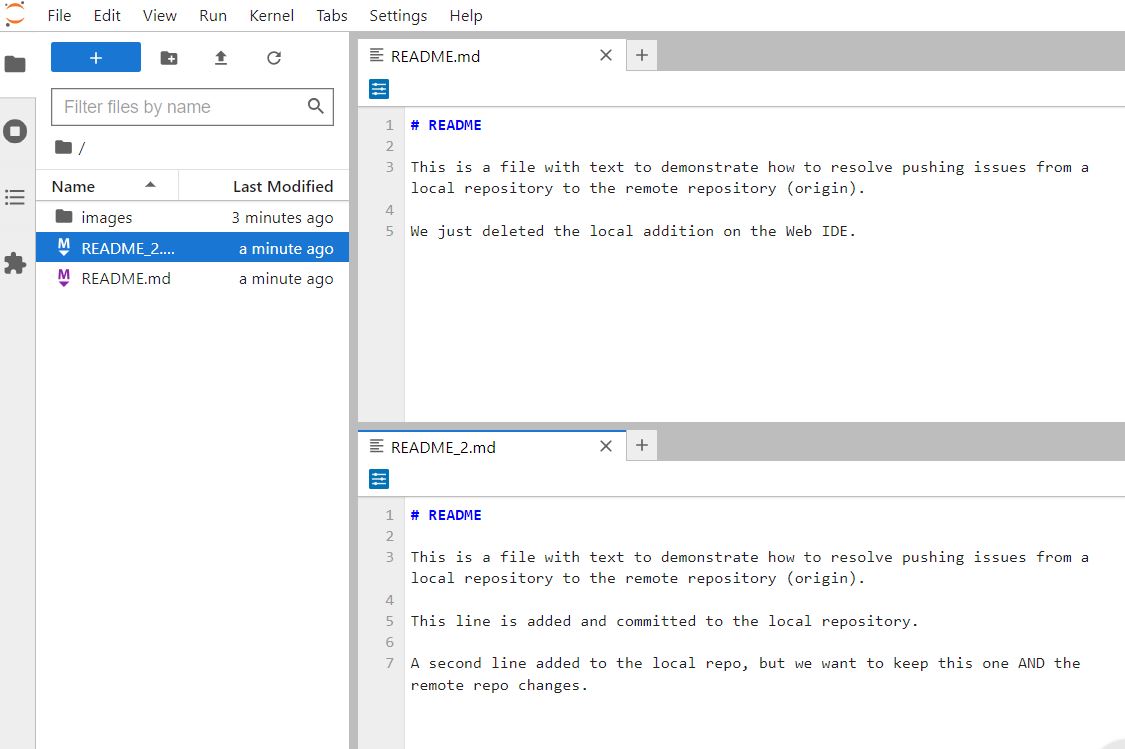
Fig. 81 Manually combine the two files.#
That’s it, you have successfully resolved the merge conflict in your notebook! Obviously, this can be time consuming and annoying. To avoid having to do this, always pull at the beginning of your session and push at the end of your session.
Revert commits#
Sometimes it may be useful to “undo” the changes made to a file in a given commit. You can do this in the history view of GitHub GUI, an right-click on a change, the select “Revert Changes in Commit.” This, as the name suggests, reverts the changes you made in that commit, and will show up as a change in history.
If you do this and then change your mind, luckily, it is reversible—but not in the way you might expect! Git reverts a commit by making a new commit, which you will immediately see in the history. Thus, you can easily revert your reverted commit using the same procedure as before: right-click on the offending commit in the history (thus reverting the revert).
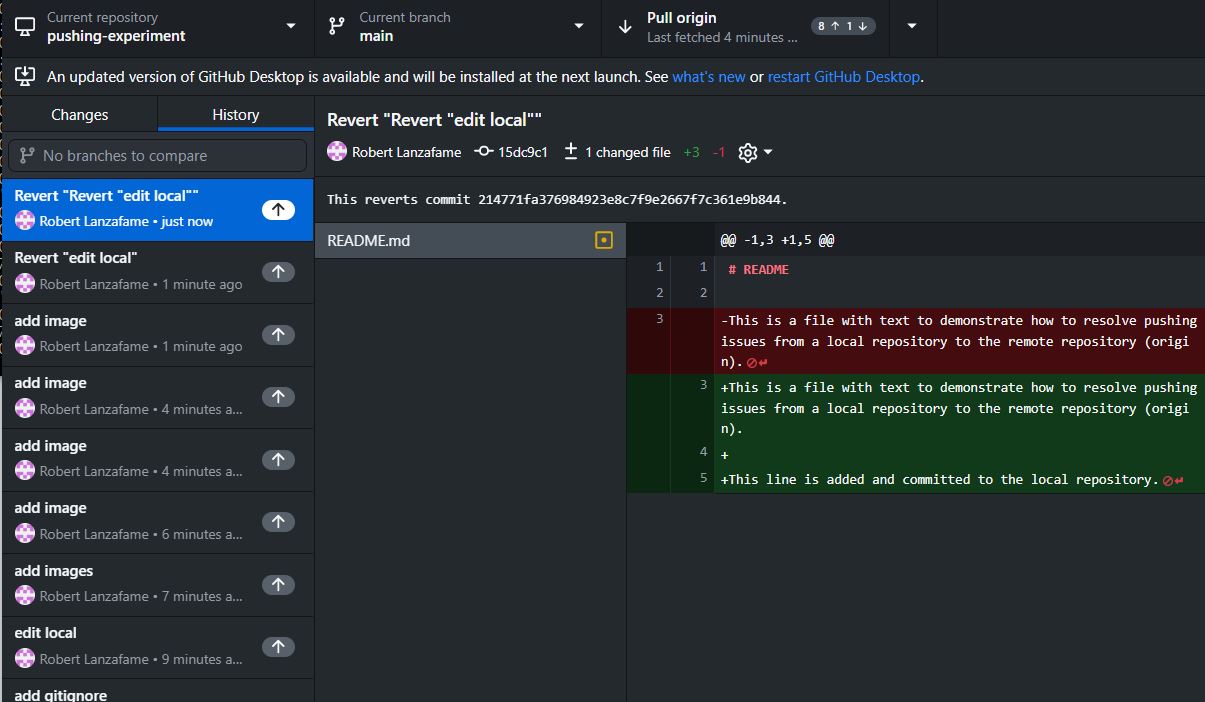
Fig. 82 Revert revert changes in the history tab.#